Unlike Sengoku Rance, Rance Quest Magnum is designed for you to be able to get absolutely every bit of the game's content in a single playthrough. This is the reason why there's no new game button: it's redundant, as every single quest is infinitely replayable and every character can (and will) get their skills reset at some point for the player to redistribute the skill points without any downsides (with upsides, in fact). Feel free to experiment with every character and do it if you feel that your current build is lacking or if you want the character to be proficient with an another weapon type. The same goes for quests: if you miss anything, you can replay and grab whatever that was. All your EXP will remain, and items get lost if you abandon the quest without using an escape device.
You can enable TADA mode in Alice's mansion, and despite what Alice tells you, this mode is perfectly fine, if not preferrable on the first playthrough (since it will most likely be your only one anyway). All it does is speed up the game's progression, and cuts a good bit of extra grinding, without a big impact on the difficulty: it's hard to be always overleveled, in fact the game has many barriers for the player to never get too strong before the story needs them to. The game is already *very* long, there's no need to make it even longer for yourself.
Good places to level up quickly[]
You'll be told in-game that the best map to farm level is Quest #97. Just try it and you will understand why. Though it is only for Characters lv 35 and under.
Other places that are good for leveling:
Quest #94 gives 1,500 to 5,000 EXP per battle. Red mines give 3,000 to 8,100 EXP. (45 and under)
Quest #126 for money. Much easier and faster to finish (compared to other quests of it's level), has a good difficulty level (that means that you can get up to level 49 without penalty), possible to finish relying on Rance mostly, without changing the party (helps when you need to fast train just few characters, you need to take south-south-south-east-north-east route to do this). Red battle events give 4,000-16,000 EXP (the most exp are rewarded for battles against a group of level 40 mercenaries or against a group of 5 monsters, where two of them are huge whales). (49 and under)
Quest #214 for up to lvl 55. Killing just two Silbarrel age 5 gives 12599 EXP. You will need a ranger to prevent surprise attacks and Silbarrel are very resistant to magic attacks. However, they have low health and are likely one shot by most of the decent physical attackers. You can just ignore the night horrors (easy to kill with Arms or light magic) and abandon quest when you are done. The nearby story battle is 5 repeated battle with 1-5 Silbarrel. 25k+ exp against 5 of them though it's quite difficult. If you do kill night horrors as well, a group of 5 (2 Silbarrel and 3 night horrors) gives 31.5k xp.
Quest #128 is pretty good - you can level there characters up to lvl 55. There are always 3 red mines on starting map you can just do them and cancel quest - your gold and experience is saved. Sometimes experience orb spawns on starting map so it it's there try to grab it before battles. Fight with 5 enemies gives 22k exp. Map is good because there are only one type of enemies, all weak to electric (except if you find Bones but they are probably easier than normal enemies). Just take your best Guard (or 2 Guards if low on lvl) and electric mage, preferable with magic barrier. At low levels you will probably lose one or two characters everytime you encounter 5 enemies, but you can just get another ones for them before win and exp someone else this way. The fact that after each battle everyone loses 1/8 of their max hp may be annoying but it shouldn't really bother you that much. On map #145 there are same enemies and there are no cannons that deal dmg after each fight but there red mines are sparse and you will just waste time fighting random encounters, reseting #128 and doing only those 3 red mines is faster way to experience. Also on #128 you ger 20% experience boost at start, and on #145 it's a little lower.
Quest #146 is also not bad if you still don't have #147 but want to exp high levels. Just farm on the right side of map (A2-A4,B4,C4), there should be good amout of red mines and you can exit in C4 to save items. The only drawback is that you will lost characters of one class when going to A2 so if that class were crucial for you, you will have to restart map.
Quest #147 for lategame farming exp/money. Each floor prior to Floor 200 will have 1 lucky can can for a free level up, noted by a green star (no "!" marks). It will be replaced by an asshole if you redo that particular floor. Green star with a "!" mark will reveal currently explored map. This is the fastest way to level way beyond 50 when paired together with raising lucky can can base EXP by the every-25-donated-items random event at Frostbyne. Apart from can can the map itself is rather bad for leveling. You can meet some nice enemies that will give you around 50k exp but it's pretty rare and you will fight mostly some weaklings that sometimes can give even 3 digit experience, so remember to always hunt for can can.
There will also be two special areas that may or may not occur within the map. One area is the Room of Plenty, where lots of coins and chests will appear with no enemies. The other area is Room of Sudden Death, filled with very high level enemies and traps. These areas are repeatable and do not need to clear the quest for it to occur.
Having Brawlers with Prolonged Battle yellow skill is helpful in maximizing chance of enemy wipeout, thereby ensuring full exp bonuses from each battle. Be prepared for tough battles to be longer too.
Magnum Gauge[]
In Rance Quest Magnum, some quest have a bar that fills up with every completed battle (see image on the right). If the bar is full when you clear the quest, you'll get a bonus item. The bonus Item is often (if not always) rare with high bonus stats (8 or 9 bonus stats is normal.) The first time you'll fill the gauge in a quest the item you receive is fixed. Refer to the Quest Walkthrough page for information on what you'll get.
Note: Every time you redo a quest that magnum feature bar needs more and more battles to fill up so it's better to complete it as soon as you can!!! You also need a free space in the quest storage or else you won't get the bonus item! Once the bar starts blinking you'll know it's full.
Note: In earlier Japanese releases there were fixed lucky can can encounters that could be fought once per save file. In later Japanese and all English releases these were removed. As such, these will not be mentioned below.
Lucky can cans are a rare random encounter which awards a very large amount of EXP when defeated. The chance to run into one depends on several factors. The initial chance is 1/100. For every time the player runs into a lucky can can, regardless of the outcome of the battle, the denominator (the 100) is increased by 40 points. For example, if the player ran into 3 lucky can can, the chance becomes 1/(100+(3x40)) or 1/220.
For every time the player receives the Frostbuy donation bonus "odds of encountering a lucky can can increase" the denominator is reduced by 50 points. Taking the previous example again, if the player encountered 3 lucky can can and received the donation bonus "odds of encountering a lucky can can increase" once, the chance becomes 1/(100+(3x40)-(1x50)) or 1/170.
If the chance goes below 1/100, the chance becomes 1/100. This also means that if the player received enough "odds of encountering a lucky can can increase" donation bonuses you can encounter lucky can can with a 1/100 chance multiple times in a row. The probability has no maximum limit, however, so 100 lucky can can encounters without donation bonuses will mean the encounter chance becomes 1/4100.
Lucky can can encounters can only occur with random battles. Red mines cannot ever give you a lucky can can. In Quest #147: Malgrid Dungeon Xth Stratum random lucky can can will not occur, but there is a green star with a fixed lucky can can encounter which can be found in a random block once per stratum. If the player has already encountered the lucky in that stratum, it will become an asshole instead, which is an enemy worth very little EXP and can use a skill to prevent a character from getting any EXP that battle. These encounters do not affect the encounter rate for random lucky can can in any way.
The current encounter rate for the lucky can can is visible in the data log upon starting a quest. Players can activate the data log by opening their config menu, navigating to the 'Other 2' tab and checking the box 'Display data log'.
As for experience, this is subject to its own rules. The base EXP amount for a lucky can can is 330,000. This further increases by 10,000 for every time the player obtained the "lucky can cans are worth more EXP" donation bonus from Frostbuy. The total amount of which cannot go beyond 990,000. In other words, after receiving the aforementioned donation bonus 66 times, the effect maxes out. However, the donation bonus may still be randomly received after this, even if it does nothing. This total, also known as enemy group EXP, serves as the base EXP from which the game calculates the amount of EXP players can receive. This should not be confused with what the battle results screen calls "Base EXP", which is actually enemy group EXP with several multipliers already calculated, including TADA mode, whether the battle is a red mine, and others. Yes, it is very confusing.
In World 3, fights against lucky can can offer more EXP if the battle lasts long enough. 8-14 turns grants a 1,5x multiplier and 15-29 turns grants a 2x multiplier.
If, after all the EXP multipliers have been added, a character's calculated experience amount comes out to higher than the amount of EXP they need for their next level up, then the amount of EXP they receive is equal to the amount they need for their next level up. Example, EXP calculates to 70,000, but the character needs 50,000 for their next level up. They will then receive 50,000 EXP instead.
Note that, while a boss version of a lucky can can is fought at the end of the 102nd to 199th stratum in Quest #147, these do not provide the EXP amounts mentioned above. Instead, they provide a base EXP total of 1, so you gain basically no EXP from it.
Lastly, lucky can can cannot attack you, nor run away. The battle only ends if you escape, give up, exhaust your skills, win, or run out of time.
Treasure Dango[]
Treasure dango are a rare random encounter that gives the player an item from the Rare Item B list when defeated. The chance to run into one depends on several factors. The initial chance is 1/1000. In World 3, this is 1/500. If Tomato is in the active party and has learned the skill Liked by Treasure Chests 2, then this is 1/500 as well. If both, it's 1/400. For every time the player receives the Frostbuy donation bonus "odds of encountering a treasure dango increase" the denominator (the 400, 500 or 1000) is reduced by 50 points. The chance bottoms out at 1/200. The donation bonus may still be randomly received after this, even if it does nothing. The current encounter rate for the treasure dango is visible in the data log upon starting a quest. Players can activate the data log by opening their config menu, navigating to the 'Other 2' tab and checking the box 'Display data log'.
The other factor is that the player must have cleared Quest #76: The Third Army of Helman first. This also unlocks Trivia 92: Rare Items, although players must reload their save files first to have it actually be added. In this trivia, the player can see all different Rare Items A and Rare Items B. The empty star icon, ☆, is placed in front of items the player does not currently own; the filled in star, ★, for Rare Items the player does. You can only own one of each item.
There are two special exceptions to the encounter rate of treasure dango. If, after clearing Quest #76, the player has also cleared Quest #206: Twin Flames' Blazing Journey, then you will run into a treasure dango once with a chance of 1/5 per random battle. And after you clear Quest #168: Despair Gathering, then this will happen again. This practically guarantees two treasure dango encounters will occur in a playthrough. Note that each of these 'practically guaranteed encounters' will occur just once, regardless of the outcome. Make sure you win and make sure you clear the quest or use a green escape portal to keep the Rare Item B. If you feel in danger of failing the quest, then restart the game by pressing Alt + R (or clicking the 'System' button on the top and then clicking 'Restart' or just closing the game and starting again. Do not abandon the quest or fail, since this will autosave and you will lose your Rare Item B and the higher encounter chance won't happen again. Also note that the effect really occurs just twice total, not twice per World, so it is highly recommended not to waste each opportunity.
If a treasure dango is encountered and defeated within the turn count, then the player receives any Rare Item B from this list at random. This continues until all Rare Items B have been obtained. If you defeat a treasure dango after already owning all Rare Items B, then you receive a random item that can normally be gotten from treasure chests and red mines in the area of that quest instead.
Three more things. First of all, treasure dango encounters can only occur with random battles. Red mines cannot ever give you a treasure dango. Second, do not worry about the treasure dango attacking or running away, despite its comments claiming it's "gotta get away". The battle only ends if you escape, give up, exhaust your skills, win, or run out of time.
Lastly, if you get the 'practically guaranteed' encounters, try reloading immediately if you receive the Emperor's Armor, Orgarhythm or Ulaanbaatar. This is because these items are received as first-time Magnum Bonuses from Quest #127, Quest #145 and Quest #171 respectively. Since first-time Magnum bonuses are guaranteed and become a random, non-'Rare Item B' if the player already owns that item, it means you miss out on a free Rare Item B. This is not recommended if the treasure dango is actually random since those are far too rare to reload for. If this happened and you did not reload, don't worry too much. While the items are certainly powerful, they are not game changers. Reload if you can, just continue without worry if you can't.
Pocky Rock[]
Pocky rock are a rare random encounter that gives the player the item Rocky Chunk when defeated. The chance to run into one depends on several factors. The initial chance is 1/1000. In World 3, this is 1/500. For every time the player receives the Frostbuy donation bonus "odds of encountering a pocky rock increase" the denominator (the 500 or 1000) is reduced by 50 points. The chance bottoms out at 1/200. The donation bonus may still be randomly received after this, even if it does nothing. The current encounter rate for the pocky rock is visible in the data log upon starting a quest. Players can activate the data log by opening their config menu, navigating to the 'Other 2' tab and checking the box 'Display data log'.
If a pocky rock is encountered and defeated within the turn count, then the player receives a Rocky Chunk. This Special Item can be given to a character and, while they have it equipped, can learn the skill Rock On, granting 10 skill points. Although the skill costs 1 skill point to buy, it remains learned after a Morurun or Skill Again. This means that the game will reimburse that skill point and thus you actually get a net gain of 10 skill points. The Special Item can be safely discarded after learning the skill.
Because of the rarity of running into these enemies and the usefulness of its reward, it is highly recommended to clear the quest or use a green escape portal to keep the Rocky Chunk if you received one. If you feel in danger of failing the quest, then restart the game by pressing Alt + R (or clicking the 'System' button on the top and then clicking 'Restart' or just closing the game and starting again. Do not abandon the quest or fail, since this will autosave and you will lose your Rocky Chunk.
In Quest #174: Mula Test Part 2, there is a one-time only Pocky Rock fight in the sixth block (B2). There are four green stars there. The first three are a fight against a stone guardian, the last is the pocky rock. This is one-time only, regardless of the outcome, so make sure you win and clear the quest to keep the reward. On subsequent attempts the pocky rock will be another stone guardian.
Two more things. First, pocky rock encounters can only occur with random battles. Red mines cannot ever give you a pocky rock. And lastly, do not worry about it running away. It can attack you however, but it typically won't be that much of a threat. The battle only ends if you escape, give up, exhaust your skills, win, or run out of time.
Abstinence Morurun (Non-Magnum)[]
Note: The following information applies specifically to vanilla Rance Quest. For Magnum (that includes the English version), please check the next section.
When a girl level 35 or above is H-ed by Rance, the girl will revert back to level 1, and her initial skill points go up by 2, up until +10 skill points after 5 Moruruns. If the girl is H-ed when she has reached her level cap (i.e. 70/70 in the case of Kenshin), her level cap will increase by 3. After the cap has been raised through this method 4 times (reaching at least Morurun Damage 5), the cap will then increase by 10 for every subsequent Morurun. So, Kenshin's caps would go: 70, 73, 76, 79, 82, 92, 102, 105 etc. This can be repeated indefinitely. However the more you do this, the more experience will be required for each re-level up.
Generally, all learned skills will be removed, thus you might want to H them ASAP, if you don't care about raising their level cap. Exceptions are two skills that can be learned through items - Rock On (acquired through a Rocky Chunk) and Familiar Knowledge (acquired through a Monster Girl Tamer Handbook).
EXP required for re-leveling is increased as well. For the first go, there is no penalty, but the second seems to cause an increase of EXP requirement up to level 37. Level 1 on second curse needs the same EXP as lv3 of the uncursed/first cursed. Level 2 on second curse needs the same EXP as lv4 of the uncursed etc.
The item equipped in the Special Item slot (the item that is gone if you remove them normally) is absorbed, meaning the stat is added to the character's stat. Other items are simply moved to the storehouse (except items that can't be removed).
Rock On,Familiar Knowledge and Forbidden Talent items don't require you to wait until the girl gets H'ed by Rance to be absorbed. The moment you learn those skills and max cap them, you can immediately replace the item used with another item that can be absorbed for permanent bonus.
New-born Kenshin (Item was the bear sculpture increasing 10 attack):
HP: 200/200
Attack: 80
Accuracy: 120%
Evasion: 15%
Stun rate: 30%
Critical rate: 20%
Speed: 25
DEF, RSN, RSL: 0
After being H-ed 5 times each next time will not give girl additional skillpoints, but still will raise required experience. Also Rance will start gaining a bonus 100 HP, 20 ATK, 20 MAG, 10 DEF, 10 RSN, 10 ACC, 10 EVA for each H session with a girl that has reached Morurun Damage 6 and over. Note Rance only gains this benefit from the girl that has the most H sessions, so if you have H-ed one girl 6 times, Rance will not gain this benefit when you H another girl 6 times.
It seems that after being H-ed 10 times each next time won't give a bonus to Rance stats, but experience requirement for leveling will finally stop rising. After 11 Moruruns Kenshin had the same requirement to next level as after the 10th (613 exp).
Don't forget that although all other girls require level 35 to be H-ed, Kenshin only needs level 30 if you use her quest instead of castle event.
Stats gained through absorbed items has a limit. Health caps at +2000, (Magic) Attack / Defense at +500, Accuracy/Evasion/Stun/Resistance at +100, Speed at +50.
Abstinence Morurun (Magnum)[]
In Rance Quest Magnum the Morurun curse system was altered. A few main points are listed below:
Quests that cause a Morurun will now only do this the first time they are completed. For all subsequent Moruruns you'll have to do a castle event.
Only the first Morurun resets the level all the way to 1, and any subsequent H will result in a decrease in 5 levels.
The level requirements have also been changed to reflect the change in level drops. Level requirements are as follow: 35, 35, 38, 41, 44, 55, 65, 75, 85 and 95.
If a character is Morurun'd after a character has joined (so not when a character joins atl level 1, like Kenshin and Kibako) then the EXP requirement does not go above 4980 until they've recouped their levels. This holds true every time any character is Morurun'd, as long as it occurs after they've joined.
It is now possible to Morurun male characters and characters with the Immature skill. This ability unlocks after completing Quest #189: Kouhime's Tea Party. Note that there are still characters that cannot be Morurun'd. Please refer to the Skills page for more information.
Other than that, the system works the same as in vanilla Quest, with some small caveats here and there. Below is a general explanation.
When a character level 35 or above is Morurun'd by Rance, they will revert back to level 1, and their initial skill points go up by 2, up until +10 skill points after 5 Moruruns. If the girl is H-ed when they have reached their level cap (i.e. 70/70 in the case of Kenshin), their level cap will increase by 3. After the cap has been raised through this method 4 times (reaching at least Morurun Damage 5), the cap will then increase by 10 for every subsequent Morurun. So, Kenshin's caps would go: 70, 73, 76, 79, 82, 92, 102, 105 etc. This can be repeated indefinitely. However the more you do this, the more experience will be required for each re-level up.
Also, every Morurun, the ATK, MAG, DEF and RSN stats will be raised by 2%, until a max of 20% at Morurun Damage 10.
Upon being Morurun'd, a character will usually lose all learned skills. Exceptions are item skills, such as Rock On, Familiar Knowledge and Alice's Protection, as well as any skills learned through that character's A Day in Cidade event (Quest #134). Some skills learned through quests will be removed however, check the Skills page for more information.
The item equipped in the Special Item slot (the item that is gone if you remove them normally) is absorbed, meaning the stat is added to the character's stat.
After reaching Morurun Damage 6, Rance will start gaining a bonus 100 HP, 20 ATK, 20 MAG, 10 DEF, 10 RSN, 10 ACC, 10 EVA for each subsequent Morurun until the max of Morurun Damage 10 has been reached. Unconfirmed Note Rance only gains this benefit from the character that has the highest Morurun Damage, so if you have Morurun'd one character 6 times, Rance will not gain this benefit when you Morurun another character 6 times. Unconfirmed
How Skill Fix works[]
Skill Fix is a skill available to any character that has been Morurun'd at least once. It costs 1 point to buy and it prevents a character from having their skills be reset upon being Morurun'd. In turn, the five levels that the character loses upon being Morurun'd will give no skill points. What does this mean in practice? An example:
Prima is level 40 and has been Morurun'd once. She has 42 total skill points to spend: 40 from her level and 2 bonus points from Morurun Damage 1. Skill Fix is bought for 1 skill point, leaving Prima with 41; which can be spent on various skills. Next, she is Morurun'd and she drops down to level 35. She retains all skills and will now have 2 more skill points because of upgrading to Morurun Damage 2. Prima is then leveled back up to level 40 and will not have gained any additional skill points. Only upon leveling up to level 41 will Prima gain another skill point.
The skill solely exist for convenience purposes. If you have skill points left over and don't want to go through the hassle of relearning the lost skills after a Morurun and don't mind using up one of your 17 'Known Skills' slots, by all means learn the skill. This skill is more useful on very high level characters than on lower levels. The skill will not give you more skill points and will only ever cost you 1 skill point. If a Skill Again is used to reset all skills, which includes Skill Fix, all points will be returned.
Get a character with Publicity asap[]
The Publicity skill causes quests with explorable maps to give double the reputation they normally would, allowing you to level up your Charisma stat faster. This allows you to make more party switches per quest. Note that quests without maps do not double reputation through Publicity. In order for the skill to activate, a character with that skill needs to be in the active party when a quest ends.
There are two ways to get a character with Publicity. The first is to complete Quest #63: Leazish Horror Story. Completing this quest causes Lia to join, who has the skill. The other option is to create a custom character through a Character Ticket (can be bought from Frostbuy for 1000G), creating the character through Quest #129: Alice's Guest and then doing Quest #106: Dark Alice's Pay2Win Room. In this quest under Ability 2, Publicity can be added to that custom character. This costs 5000G to add, making it unfortunately rather expensive early on in the game. Note that if you already selected a skill for that custom character before, the costs may be higher. See the Custom Characters page for more details on that.
As far as how Publicity works, it doesn't actually give you any more reputation. Instead, it makes getting all the repuation more efficient. Normally, a quests can pay out up to double the initial reputation stat. Every time the quest is cleared, the amount of reputation awarded will be halved (rounded down, if need be, unless it's 1 point). This means a quest needs to be completed many times before all reputation is exhausted. However, when a quest is completed under the effects of Publicity, all reputation is awarded with one run-through. This skill also works if you've already completed a quest once, it's just less efficient that way.
An example: Say a quest offers a maximum of 40 reputation. The initial amount awarded is 20. Without Publicity, this would require 7 playthroughs of that quest to get all the reputation. 20->10->5->2->1->1->1. With Publicity however, we get all 40 with just one playthrough, saving up to 6 playthroughs. If the quest had already been cleared once, we'd still reach 40 if we use Publicity the second time, so 20->20.
There's one caveat, though. A quest that starts with an odd amount of reputation points (like 15), must be completed the first time with Publicity to get all the reputation. Because of rounding, the game will always result in paying out 1 fewer point, regardless of when Publicity is used, once the quest has been cleared once. This isn't terrible or run-ending per se, but you'd probably want all the reputation you can get, especially for later Worlds.
Rance Castle[]
Once you clear Quest #20: Rance Castle, Complete, Rance Castle becomes available in the menu. When you select it, you are brought into a menu where Rance can talk to his various party members. For most non-custom characters, the first few times you speak to them they will gain 1 skill point. These skill points are permanently added to the character's total, so they stay after a Morurun or use of a Skill Again Special Item.
It is also possible to Morurun eligible characters here. This will be denoted with a pink heart symbol (any girl Rance can H) or the word Morurun (for Immature girls or men, only available after clearing Quest #189: Kouhime's Tea Party). Generally speaking, you want to Morurun a girl through their relevant Quest(s) first, then Morurun them every subsequent time in Rance Castle. The quest-based Moruruns only work one time each anyway.
Upon seeing an event, the castle will be closed for cleaning, preventing the player from seeing any more events until any quest is cleared. Quest #16: Scouting at the Bar is really good for this as it is just a couple of textboxes. If you clear Quest #137: Cockroach Extermination Continued, then the castle will become available at all times.
There are two more things of note:
Sometimes, a character that can be Morurun'd may not immediately show up when selecting the Rance Castle screen. This particularly happens with characters that appear in the same room, like Kenshin, Katsuko and Torako. When that happens, select any other screen, then switch back to the Castle screen. If a character appears in the guest room, just add them to the active party to make them appear every time.
Some characters cannot be Morurun'd, at least not in World 1.
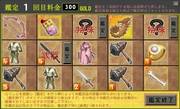
Donate items instead of selling them[]
All items, however rare they are, will only sell for 10G. But if you donate them to Frostbuy, then every 25 items you donate will cause Tama to offer various rewards. Early on, you'll mostly get random rank Special Items. Note that each of these items can be bought once, but may become available again as a random donation reward.
Confirmed rewards are:
Some random donation rewards that can be received from Frostbuy.
Any Special item ranked C through A (only if not already available)
Armor 'T-shirt' (only if not already available)
Armor 'High Grade Adventurer Outfit' (only if not already available)
Armor 'Commander's Uniform' (only if not already available)
Armor 'Quintessential Ninja' (only if not already available)
Armor 'Sengoku Rance Armor' (only if not already available)
Sometimes when you donate 25 items there is no event in the shop (statistically one out of four times). Perhaps it's due to leaving all B-rank items in shop without buying them. But it seems that if you don't buy them chances to get A rank items increase.Is this true for the most recent version? Was able to get a donation every time even after 3000 donations
Another Tip: Clearing Quest #83 again and again will give you lots of clubs and other items to donate.
Quest #101-#104[]
These quests give you a free 1 level for your entire party (only apply to people under level 40). So please take these quests wisely.
In this, the "entire party" includes those that are in your waiting slots, not just the 5 characters you picked out for your team.
Btw, if you really want to watch the event but still don't want to get free level, just close the game before the quest finish.
You get Reputation for these, so you might as do them regardless of the free levels.
Hammer[]
Hammers have very high attack power. However, your damage is often capped by the Melee Attack skills (500 damage for Melee Attack 1, 1000 damage for Melee Attack 2, and 2000 damage for Melee Attack 3). This may cause some frustration. Therefore, you want to invest in Damage Maximum, which increases the damage limit on every skill that has one.
On the downside, the accuracy of hammers is really low, generally decreasing ACC by -10~-99. Hammers also have their hit chance capped at 85% with all their attacks and abilities, giving them a 15% chance to miss. Thus, hammer users are best used alongside characters who are good at stunning. Stunned enemies cannot dodge, so accuracy becomes 100%.
Spear[]
If you equip a spear and upgrade Spear Knowledge to ★★ all that character's available attacks become ranged. This may be worth equipping on your Fighters.
There are two useful skills that can be learned if Spear Knowledge is learned until ★:
Spear Flurry is an attack that hits 2-4 hits x0.6 attack and can be used multiple times in the same battle if uses are left;
Gale Thrust gives a +5% Attack and +5 Speedevery time it is used and the effects will remain for the entire current quest duration.
Spear Knowledge provides versatility in exchange firepower compared to Sword Knowledge. Do note that the attack boosts provided by Sword Knowledge become progressively less powerful as your character's base stats rise, so the differemnce in strebgth is much less apparent later on.
Escape[]
Escaping may be a useful strategy during random battles in quests. Because your skills are limited, it's sometimes better to try to run away to preserve them for an upcoming battle or to just keep your character's in good health. Escaping requires the skill Escape, which can be learned by Rance and all rangers and has a max of 2 uses for Rance and 3 uses for rangers.
Escape starts at a 20% chance and increases by 5% every time any of your characters takes any action. If a character at the start of battle knows Escape Skills (rangers only), then the starting percentage changes to 40%, 60%, 80% or 100%, depending on the rank of the skill. However, only Crane can learn Escape Skills ★★★. The other rangers max out at ★.
Intimidation[]
Intimidation is a skill exclusive to Kenshin and Kibako. The skill raises the chance that weak enemies you randomly encounter will run away before engaging in battle by 20%, which can save you a lot of time and trouble for clearing quests (provided you are as strong, if not stronger than these mobs).
How this skill works and the effectiveness of it is heavy reliant on your party's average level vs the quest difficulty. For example, if Kenshin is level 52, but she is in a team of four level 30 characters doing a quest level difficulty of 36, you'll still run into random encounters very often, because your active party's average level is only 34.
Noe that there is an innate rate in which monsters will not engage if your team average is higher than the quest level, Intimidation just raises that chance.
It is currently unknown if this skill stacks, i.e. if having two character's with Intimidation raises the chance even further.
Athena 2.0[]
Athena level is always 1, has no skill points and cannot gain any, and only has Ranged Attack 1, Ranged Attack 2 and Ranged Attack 3 at one use each. However, she has 5 unique yellow skills that allow her to increase her stats after each battle if the corresponding stat is lower than that of the person to the front-left of her (meaning she must be in the back row). Also, her HP and number of attacks are reset after battle.
The yellow skills are: Attack Studies (+3 ATK per battle), Accuracy Studies (+2 ACC per battle), Speed Studies (+1 SPD per battle), HP Studies (+5 HP per battle), and Crit Studies (+1 CRT per battle). As ACC and CRT reach their cap well before the other stats do (200 and 100 respectively) and SPD doesn't require a lot of grinding to raise up, it is advised to raise/max those skills first. Afterwards, you can equip her attacking skills alongside Attack Studies and HP Studies.
The Soul Shackle and Go Home - Why a character may leave the party after battle[]
There are two special situations in which a certain character leaves the party after battle. The first is if a character has a Soul Shackle equipped. There doesn't seem to be any advantage. A gloomy atmosphere floats about it. Basically, don't ever equip it. Do, however, keep any you find in the vault. You'll be able to trade these in for valuable Alice Coins through Quest #166, which becomes available during the Magnum storyline.
The other is if you have a character in the active party with Go Home. The sorcerer Aten Gnu comes with this skill, which gives a 20% chance of withdrawing from the party after the end of every battle. Custom characters can also be given this skill.
Characters with above conditions won't retreat on maps without random battles, such as the final cockroach extermination quest. Also, if a random battle plays a cutscene afterwards (like Quest #128), they will not leave either.
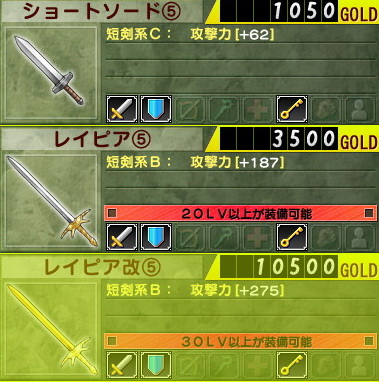
Improving Shop Weapon and Armor Quality[]
As each weapon and armor is purchased from the shop, its quality will improve by 1 rank, up to rank 9, which will be shown as a (9) after the item name. Each rank boosts the Attack, Magic, Defense and Resistance of each item, if it has those stats. However, the item will also become more expensive to purchase. Below is a table to explain the stat and cost requirement gains:
Frostbuy equipment cost and stat growth increases per rank, compared to initial rank
Rank
Attack, Magic, Defense and Resistance growths
Cost to buy at Frostbuy
Initial
100%
100%
(1)
105%
130%
(2)
110%
150%
(3)
115%
200%
(4)
120%
250%
(5)
125%
300%
(6)
128%
320%
(7)
130%
350%
(8)
132%
370%
(9)
135%
400%
This also affects the rank of weapon and armor drops obtained in quests. To take advantage of this: buy the equipment 8 times, until (9) is shown on the equipment. Then go hunt for it in a dungeon. This will get you the same ranked item that would be even better than from the shop. Sample picture showing the stats improvement from the rank number after item name (right).
Note, however, that the stats raise by less after rank (5), so you may wish to stop there if the cost becomes too high.
New items at Frostbuy[]
Throughout the game, Frostbuy will make new weapons and armor available. Which items you unlock depends on Rance's level. Below is a list of the unlock requirements for weapons & armors at Frostbuy:
Lv 23: Rank B Weapons & Armors
Lv 32: Rank B upgraded Weapons
Lv 43: Rank A Weapons & Armors
Lv 49: 1 Rank CC & Rank AA Armors
To unlock the upgraded weapons, purchase the same Rank B equipment at least once, leave the shop and return. If Rance has reached level 32, an upgraded version of that weapon will become available on the next shop visit. The upgraded weapons are Modified Rapier, Modified Buster Sword, Modified Hammer B, Modified Spear, Modified Longbow and Modified Knuckle.
For more info regarding which items are available at Frostbuy, check the equipment page.
Getting Jewels[]
A jewel.
Jewels (宝石) appear as an open blue jewel case with a gem inside it. You can start obtaining it randomly from any dungeon, once you've triggered an event with Crane that talks about it and have Quest #80 unlocked. Once you get one, you can take quest #80 to exchange it for a +20 level-cap item. You can repeatedly and indefinitely obtain the jewel and exchange it, however you can only have one jewel at a time - you won't gain another one until you've traded the current one you have.
Note: jewels have a high priority for rare item drops. If you trade in a jewel for a Forbidden Talent you are therefore indirectly giving up on one such item.
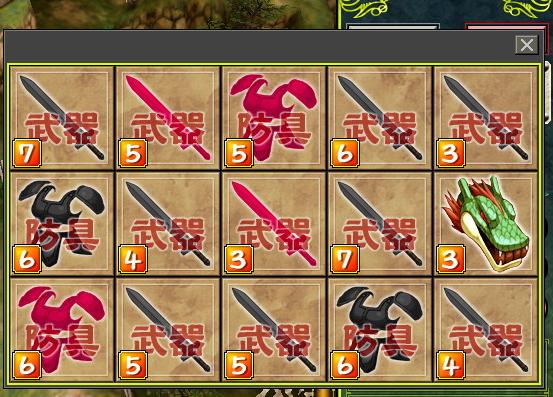
Farming high level items[]
When you obtain items from a dungeon it may contain bonus points. Bonus points are shown in orange boxes on the bottom left of items. Bonus points may randomly boost an item's stats or give it an additional stat or effect. For a better explanation regarding Bonus points, please check the Equipment page.
Additional bonus points may be rewarded to all unidentified items if you complete dungeon requirements. These are the three items listed underneath the minimap on the right side of the dungeon screen. The first is collecting enough adventure achievements, which appear as orange orbs with yellow cones sticking out. Second are level ups, which requires your characters to level up a certain number of times. Note that these track the amount of characters that level up per battle, not the amount of level ups you got. In other words, if two characters level up simultaneously after one battle that counts as two level ups. But if one character gains enough experience to level up twice in a row, that'll count as just one. Last is the red mines, where you just need to beat a certain number if them. Each of these are worth one additional bonus point.
Because these bonus points are separate stat increases from the item's rank, items that receive high values in both are the strongest. Note that rank is more consistent for stat boosts, whereas bonus points have stronger potential.
When farming items, keep the following in mind:
Make a team consisting of Tomato Puree, Kenshin or Kibako and at least two Rangers. You may want a strong screen clearing character like Torako. You may also want a Civilian. Merim may be a good bet for that.
Tomato should have Liked by Treasure Chests, which will increase the amount of red chests spawned.
Also consider equipping Tomato with her skill Weapon & Armor Lover, Special Item Lover or Item Lover to increase the drop rate of that specific type of item. Do note that you can only equip one at a time or else it won't work.
Kenshin or Kibako should have Intimidate, which helps prevent random encounters.
Your Rangers should have Chest Opening ★★★, Trap Evasion ★★★ and preferably Covert Movement ★★★ to help delay random encounters.
If you are using a Civilian they should have Improve Fortune to improve the bonus points of items found.
Merim is useful because she comes with Chest Opening and Trap Evasion. She also comes with Treasure Appraisal+ which will automatically identify any items you find. This, however, is a double-edged sword as items that are identified do not gain any extra bonus points you may get from fulfilling dungeon requirements, like gaining level ups and defeating enough red mines. Keep this in mind.
Also, Intimidation works best if your party's average level exceeds the quest difficulty. So make sure your party's level is high enough.
Don't forget to donate items you find or items already in your vault, you may find them at higher ranks when farming. Especially donate Rare type A items, such as Kou's armor or Shizuka's staff.
Swap characters in and out as needed. If one Ranger runs out of Chest Opening, you can always switch in another. Same for Kenshin/Kibako and others.
If your quest inventory gets full, discard any items you aren't planning to keep or aren't worth donating.
As far as good quests to farm items in, you may want to do Quest #93 or Quest #126.
For Quest #93, room C2 in particular contains a good number of chests. You may want to use a green teleporter to leave early, if you run into it.
Quest #126 is generally shorter, plus the last chest, next to the end, gives an additional 3 bonus points to whatever item it gives.
Upgrade to higher difficulty quests as your level rises; better rewards are usually given then. But the above give a lot of rewards.
- Quest #227: Boss 100 - World 3 only) is the best place to get high level items. Prepare a team with: Merim (Treasure Appraisal+ and Chest Opening), one or two Rangers with max Chest Opening and Tomato. Also, definitely bring a Brawler in case of elastic grapes. Start the quest and open all the chests, reload if there are no chests or nothing good came out. Fight mobs in 4x red mines (cockroaches, sumos, elastic grapes, etc.) then fight the boss in the red star at the center to clear. The fight consists of Ice dekants and 2x happy.
Merim Tser[]
Merim has a unique skill called Treasure Appraisal+, which allows you to identify all treasures when you receive them. This means that you won't be able to use the 3 bonuses to strengthen the item, but alternatively it means you don't have to spend gold to gamble on an item with high bonus points that turns out to be a longsword.
You can still receive some nice equips with high bonus points with her in the party (especially if she has Improve Fortune, and it saves a lot of gold. Note that because of Easy Target, Merim will frequently be targeted by enemy attacks, so keep her protected with guards or fast heavy hitters that can defeat the enemies before they have a chance to act.
Organizing your quests[]
Quests are displayed by default in numerical order. It is possible to favorite quests by clicking "SAVE AS FAVORITE QUEST" when selecting a quest in the menu. Favorited quests will now appear at the top of the list. It may be useful for such quests as:
Quest #80: Gem Lady (where you exchange jewels for forbidden talents),
It is also possible to store quests by clicking "MOVE QUEST TO STORAGE". This will move the quest to a separate list accessible by clicking the "STORED QUESTS" button. The quest will remain there until dragged back to the main list. Be careful though, if the quest becomes active again (this can happen with Quest #13: Alice's Mansion and Quest #16: Scouting at the Bar), it will still remain in that list, so check it from time to time if you moved those quests to storage.
Crane rumors[]
The character Crane will always overhear secrets wherever she goes. This is reflected in her skill Eavesdrop. If you have her in the active party, when you move to another block during quests, you may see events where she hears hints about obtaining new party members or certain quests. Anything Crane overhears will be recorded in trivia entry #35: Crane's Secrets. You can check these whenever you're not doing quests.
Quest #80: Gem Lady and Quest #190: The Shepherds and the Darksword require Crane to overhear a rumor to unlock them. No party members are unlocked through Crane's Eavesdrop, the rumors only serve as hints.
Multihit skills[]
Attacks that hit one or several enemies multiple times are unique in that they work a little differently depending on whether you choose an initial target or not.
An example to illustrate. You're in a battle going up against three enemies, two in the front and one in the back. You have a character with Spear Flurry, which hits one enemy between 2-4 times. Each individual attack is strong enough to kill each enemy. If you mouse over the enemy in the front and select Spear Flurry it will hit once and kill the enemy. Then the turn ends. However, if instead you choose the skill in the list next to the character's portrait, the attack will instead choose its target randomly for every hit, but if it kills the target it will keep going until it hits the maximum amount of hits. In ths example, it will kill the front target, then any of the back targets at random, plus possibly the last target as well. This way you may get more mileage out of your multihit skills.
This works with any multihit skill such as Spear Flurry, Rapid Fire, Winding Wheel Sword and Wild Dance. It will also work with Melee Attack if you have Sword Knowledge or Short Sword Knowledge leveled up enough to have the effects 'Chance to attack twice' and 'Chance to attack three times' unlocked, provided you have the appropiate weapon equipped (swords for Sword Knowledge and short swords for Short Sword Knowledge).
Damage Cap[]
Each attack skill may have a limit to the damage it can do, regardless of the character's ATK or MAG stat. These damage caps are listed on each skill that has one. While you may be tempted to replace a skill as soon as your character's offensive stats exceed the damage limit, this is not always the best choice, considering that every character starts off with a decent amount of level 1 attack skills and learning a stronger skill can be costly, skill points-wise.
While the exact workings of the damage cap are not yet fully understood, there are four factors that will increase the damage you do above the damage cap:
Damage Maximum. This skill raises the amount of damage dealt by a certain percentage, depending on how much the skill is upgraded and whether it is equipped. At its strongest, it will double the limit on any damaging skill.
Critical hits. Crits always add an additional amount of damage to a skill, but how much is unclear. It likely hovers around 25%. Brawlers can reach 100% CRT quite effectively, permanently adding damage to their skills.
Hitting a stunned enemy with a physical attack. If an enemy is stunned and then hit with a physical attack, it will do more damage (around 30% more?). This only works if the enemy is hit while still being stunned; if the enemy has recovered from stun, the bonus damage will not apply. Also, magical attacks do not benefit from this bonus.
Higher ATK or MAG. Despite skills like Melee Attack 1 claiming they cap out at 500 damage, getting higher ATK or MAG (depending on the skill used) does in fact increase the damage you do. However, the damage you deal will not scale up as well compared to skills without limits and you'll also seem to get diminishing returns as your offensive stats grow. Regardless, higher ATK/MAG = more damage.
Note that each factor is calculated separately, so they all stack with one another. Even Damage Maximum will still affect damage dealt even if your ATK/MAG is 10 times higher than the damage cap of the skill used.
Stun Chance Cap[]
It does not matter how high you raise your STN, the maximum chance for stunning an enemy is 75%. This can be checked by reading the battle log (bottom right hand corner) after you make a hit, or through Battle Forecast. You should still raise your STN as much as possible to deal with bosses that have higher resilience. STN caps at 200%.
Also, keep the following in mind:
You can only stun with physical attacks, including ranged and AOE. Incredibly important in higher Worlds, especially World 3.
Physical attacks also deal more damage against an enemy that is stunned.
Stun takes precedence over poison. A poisoned enemy will be 'miraculously' cured after being stunned as game mechanics allows only 1 active negative status.
World 3[]
Last world of magnum game, which has a lot of changes compare to previous worlds:
Skills: First thing can be seen is all the stats up yellow skills (strengthen attack...) will become white skills (passive skills), thus you don't need to equip them for full effects. There are also new "bonus damage" skills from 3 to 5 after you get "bonus damage 2". Some character's skills are changed also (for example Rance's "Brutal Attack" can get to 3 uses max).
Monster: As showed in ingame Tips, they are 4x stronger, some can even ohko your characters even with proper equipment (for example Valkyrie can 5000~10000 per hit ignore defense) and some bosses will take forever to kill (even with a lv150 average party, it's impossible to kill Anmos or Gunagun, while Black Dragon will need all your moves). In some quests, Battle Note will show up in boss fight, it's wise to assassinate them asap, list of quests so far: #64, 65, 72. There are also 2 new monsters: Philanthropist Gates same as Gates 95 but apparently "older", he gives a lot of exp (1 million is the highest so far) and can be seen very often, most of the time is with a Valkyrie; Gold Coin, they are gold coins just like the name, no action but high evade and HP, each coin dropped after killing them will give 2000 gold (Scaling with Copandons passive so switching in Copandon when you encounter them can yield up to 80 000G). "Weak monster" does not exist in this world, thus Kibako and Kenshin's unique skill intimidation "威圧" is useless.
Quest: Not much changes beside from 2 new unique quests: Boss 100 and Boss 200. Both are good for getting items, the first one's boss is Ice Giga - fast and hit hard, even at 99% tolerance you will still be stunned often. The second one's is Kaito, same as the one in #192, Guard with 4000 Def will receive ~9000 damage per hit (note that he still can deal two hits per turn). Another noticeable change is in #77, all the Green Stars will warp you to next +10 floors by default, which makes the quest a lot easier than in previous world (not with Full Kalar though).
Other:
All the S-rank M-items will show up in shop.
All characters are morurunable in this world from the beginning, and infinitely so.
All unique equipments are removable(Angel's Mirror, Stealth Suit, Stealth Tech, Harumaki, Hiroshi-kun, Remnant), be careful when removing them though, for example Hiroshi-kun turn out to be Civilian/Sparta only.
Suspend Save[]
Normally, when you suspend the game in a quest, your suspend point save files will be deleted when you resume the game. However, you can back up those files in a different folder and paste them back in as many times as you like. To do so, first go in a quest with a map and open the menu in the bottom left corner, then click Suspend Save. Now, open the save folder for Rance Quest (click OpenSaveFolder.exe for convenience) and open the folder 'SaveData'. Next, back up the following files to any other folder:
ランス・クエスト_930.ASD
ランス・クエスト_930_DAT.ASD
ランス・クエスト_930_INF.ASD
(You may also find the files listed as RanceQuestMagnum_930.ASD etc. instead)
Uses for this may include:
Obtaining a rare item from a chest or treasure dango you dont want to lose.
Playing a high difficulty quest where your team can be easily wiped by random enemies.
Saving right before a hard boss in a lengthy quest,
During Quest #199, right before the final event (the quiz event). This is highly recommended, because it's a very long quest, and one wrong answer will fail the quest.
Buy Clubs[]
If you're able to, buy the Club from Frostbyne as early as possible to unlock its highest grade (+9 Club). some of your characters will benefit more from a Club than with their specific weapon class.


