
Item Drop Rates[]
There are, roughly speaking, four different ways to acquire items in Rance Quest Magnum (excluding FrostBuy and one-off items). These are: green chests, red chests, post-battle, and magnum bonuses. They each obey their own mechanics on how they generate items, and what bonus point (BP) value to place on them. Magnum bonuses tend to be fixed, aside from Malgrid and a few exceptions, so those will be ignored here. Getting a drop short-circuits the rest of the logic, and percentages are mutually exclusive. For example, for chests, there is a 5% chance of getting a Rare Drop. If that happens, none of the other calculations will happen. Then there is a 15% chance of getting an Item. Then there is a 30% chance of getting a Special Item. (As opposed to 5 + 15 + 30 implying a 50% chance of getting a Weapon/Armor. The actual odds would be 43.475%).
Chests[]
- BP Calculation (start from 0)
- 50% chance of adding a random number from 1-3
- Add 1 if it is a red chest
- Add 1 if a party member has Improve Fortune
- Add 3 if this is a extra bonus point chest (last chest in Malgrid 1-6, Malgrid X)
- Add 2 if this is World 3
- Girl Scrolls
- If you have beaten The Third Army of Helman, guarantee Mill, Elenoa, and Karma's scrolls, in order
- If you have beaten Papal Inauguration Ceremony, guarantee Nozomi, Shitomone,and Wichita's scrolls, in order
- 75% chance of applying Tomato's preference skills (Weapon and Armor Lover, Special Item Lover, Item Lover) to force something from that respective group
- Certain types of chests get a "3 Bonus" that adds a 10% likelihood to certain drops (more research needed, seems to apply to specific chests on specific quests, and also all chests in Malgrid X)
- (5 + Rare Chance Increase)% odds of getting a Rare Drop
- The Rare Chance Increase increases by 2 after opening each chest
- The Rare Chance Increase resets to 0 after getting a rare item
- 15 + "3 Bonus" chance of getting an Item
- 30 + "3 Bonus" chance of getting a Special Item
- Otherwise, get a Weapon/Armor with the specified BP value
Battle[]
There is a 50% chance of getting an item if all enemies in a red battle encounter have been defeated, or a 100% chance of getting an item if all enemies in a red battle encounter have been defeated and Tomato is in the party.
- BP Calculation (start from 0) (some increases may be illogical)
- 50% chance of adding a random number from 1-3
- Add 1 if it is a red chest
- Add 1 if a party member has Improve Fortune
- Add 3 if this is a forced rare item (last chest in Malgrid 1-6, Malgrid X)
- Add 2 if this is World 3
- 30% chance of getting an Item
- Otherwise, get a Weapon/Armor with the specified BP value
Magnum Bonus (unfixed)[]
This formula only applies to unfixed bonuses. Most bonuses are fixed. And some bonuses use a different formula.
- BP Calculation (start from 3)
- Add a random number from 1-5
- 20% chance of getting a Rare Drop
- 30% of getting a Special Item
- Otherwise, get a Weapon/Armor with the specified BP value
Auto-identification[]
Some Drops (Club, Girl Scrolls, Posters) are automatically identified. For the rest, the following formula is applied sequentially:
- 1/3 chance of auto-identification
- If BP is 0, then another 1/2 chance of auto-identification
- If a character has Treasure Appraisal, then another 2/3 chance of auto-identification
- If a character (Merim) has Treasure Appraisal+, then auto-identify
Rare Drops[]
Rules are applied sequentially, and immediately end once the rare drop's contents are set. If everything fails, then the above rules will act like the X% chance of a Rare Drop evaluated to false. Some things to note are that giving away certain items (Jewel, Forbidden Talent (weak), Lotion) will actually take away a Rare Drop from the player. For all items, they can only be dropped if they are not owned already.
- 2/3 chance of getting a Jewel
- 1/2 chance of getting a Sel scroll (but not on Runaway Ninja Fukiya)
- If Malgrid 3rd Stratum is cleared, 1/2 chance of getting a Karma scroll
- If Invade the Kalar Village has been cleared, and Days at the Macatt Bar has not been cleared, get a Lotion (A-C, in order)
- If Frostbuy has started selling Capture Rope, 1/3 chance of getting a Capture Rope
- 1/3 chance of getting a Forbidden Talent (weak)
- 1/5 chance of getting a Learning Device
- 1/5 chance of getting a Hanny Goods
- If a Capture Rope is owned,1/5 chance of getting a Strong Capture Rope
- If Yuzumi has been recruited, 1/3 chance of getting an Arquebus
- If an Aquebus is owned, 1/8 chance of getting a Modified Arquebus
- If an Ibeprofun EX Box is owned, 1/15 chance of getting a Ibeprofun EX+ Box
- If Kaito has been cleared
- 1/20 chance of getting a White Nurse's Outfit
- 1/20 chance of getting a Black Nurse's Outfit
- If on World 3:
- 1/15 chance of getting a Dewdrop Axe
- 1/15 chance of getting a Tarampi Suit
- 1/15 chance of getting a Maid Outfit
- Pick a random number from 1-4 (if already owned, continue to next step)
- Get a Shitomone scroll
- Get a Karma scroll
- Get a Wichita scroll
- Get a Nozomi scroll
- 1/3 chance of getting a Rare Item A, or any of the exceptions. The first drop that is not owned is the one that will be picked. There are implicit requirements for the Rare Item A drops that the requisite Quest has already been cleared for that character. Some unique items, such as Poison Dango, cannot be donated conventionally, but act as Rare Item A in this case.
- Lia's Clothes
- Sailor Uniform
- Oda Armor
- Lia's Whip
- Omikuji Box
- Decapitating Blade
- Chaos the Darksword
- Crystal Rod
- Tulip 1
- Stealth Suit
- Puncher
- Naginata
- Queen's Staff
- Orgarhythm
- Emperor's Armor
- Poison Dango
- By Road
- Leazas Red General Armor
- 1/500 chance of getting a Rare Item B (excluding Orgarhythm and Emperor's Armor). A random number from 1-11 is selected, and if that slot is already owned, then no item is gotten.
- Sacred Tree Armor
- Ulaanbaatar
- Champion
- Magic Minister
- Uruncel Blade
- Persiom
- Comet
- Terror Spear
- Stronger
- Buddha
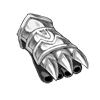
- Dragon Gloves
- If Tower of Babel has been completed, 1/5 chance of getting a random S-tier Special Item. The HP+ item has a rate of 3/13, while the rest have a rate of 1/13 (these add up to 100%)
- Otherwise, go back to the original drop calculation and progress to the next normal drop
Item ranking and bonuses[]
Weapons and armor all have an overall rank that goes from nothing to ⑤. For shop items this rank raises after buying an item and leaving, so on your next visit that longsword will suddenly have a ① after its name if you bought one. This rank increases the price of items by 50% per level and damage/defense by 5% per level, meaning that at rank ⑤ items will be 25% better but cost 250% more gold. Additionally, this rank affects all random drops you get during quests. So if the shop is selling a rank ⑤ longsword, ALL longswords you get later will have rank ⑤ too. For rare items the rank is equal to which world you found the item (confirmed till world 3). For example, if you find Hideo Sword at world 2 then you'll get Hideo Sword with rank ②. But it doesn't work with the first world, all rare items you get at the first world, have no rank.
For Magnum the rank goes up to ⑨. Also the increase of price and damage/defense is different. All percentages are calculated from base values at no rank.
| Rank | Price | ATK/MAG/DEF/RSN |
|---|---|---|
| ① | +30% | +5% |
| ② | +50% | +10% |
| ③ | +100% | +15% |
| ④ | +150% | +20% |
| ⑤ | +200% | +25% |
| ⑥ | +220% | +28% |
| ⑦ | +250% | +30% |
| ⑧ | +270% | +32% |
| ⑨ | +300% | +35% |
Weapons, armor and some Special Items dropped from quests can have a random number of bonuses, denoted by the number on the lower left corner of the item icon. This number can be increased by fulfilling the bonus condition(s) in the quest. Note that this method only affects unidentified items. There are three types of bonus conditions, from top to bottom: collect a number of yellow spiky orbs, level up a number of times, win (not escape or time-out) a number of red spiky orb battles.
Generally, higher ranked items are found in quests with higher difficulty.
"Talent" attribute[]
Some weapons and armor have Talent (also known as Growth) (displayed as 成長率0%) or Talent R (GrowthRare) (成長率R0%) bonus on them. This allows them to increase their base stats the more you use them. Talent is capped at 1000% and Talent R at 3000% (?)(capped at 5000%). Equipment does not need to be rare to get growthrare.
2.082TADA: After completing quest #173 or #174 or #192 the rare chance to get Talent R bonus on regular equipments becomes enabled. (I got the first one on a Knuckle KAI in #174)
Weapons of C or CC rank get +5 to attack or/and magic for each 100% growth, B or BB rank - +10, and A, AA, S and SS rank weapons (and guns) get +20 to attack for each 100% growth. Attack or Magic must be present on item to get the growth bonus.
Armor of C or CC rank gets +5 to physical and magical defense for each 100% growth up to a maximum of +50, B or BB rank armor gets +10 up to a maximum of +100, and, finally, armor of A or AA rank gets +20 to both stats for each 100% growth up to a maximum of +200.
For armors that have attack attribute for example Hell Set or Warrior Armor, the attack growth seems half of the physical and magical defense growth. (need confirmation) - Not true, armor's attack attribute will stay the same as its defense growth normally (T.Ha).
Talent is not working on characters that have too high level. If character got red message "Monsters are too weak" on experience distribution skill after battle, his weapon or armor will not gain any growth. This rule does not work on armor growth.
Example:
1. Rance lvl 51 is leveling on map with monsters level 43, and wearing a leather armor with level 39 requirement. It does not grow. After moving armor on Kanami who is level 40 (with a maximum of 40) it starts growing, although she does not get any experience due to hitting max level.
2. Rance lvl 52, wearing a sword that is also level 52 and leveling on a map with monster level 43 - item does not grow. On map level 47 item grows.
The growth may have connection with exp the equiped character receives, not the number of times the item is used (confirmed, you just have to equip the item). My Onoha equiped a maid girl monster 1%. The maid only healed once. Onoha didn't get to move even once. After one dungeon, the maid was 80%. - as for girl monster to growth, the girl monster must appear along with the character that's equipping it in combat. It doesn't need to act though.
"Body boost" attribute[]
Displayed as 身体ブースト5% or 身体ブースト10%. Increases character's Attack, Defense, Magic and Resistance by 5% or 10%.
2.082TADA: After completing Malgrid 10th floor, the chance to get Boost 5-10% bonus on regular equipments becomes enabled.
"Efficient Action" attribute[]
Displayed as 効率行動. Can be found only on some unique items (like Shizuka's Crystal Rod or Pastel's Queen's Staff). Does the same thing as the skill Efficient Action: Grants a chance a skill use won't be consumed when attacking.
"Shatters Invincibility Fields" attribute[]
Displayed as 無敵結界破壊. Can be found only on Rance's unique sword Chaos. Removes Dark Lord's invincibility field after attacking them once with Chaos.
"Recovery After Battle" attribute[]
Appears in two forms: Partial Recovery and Full Recovery.
- Partial Recovery After Battle recovers 25% of max HP after every fight. Can be found on Miko Outfit.
- Full Recovery After Battle fully recovers character's HP after battle. Can be found only on Lia's clothes. Displayed as 戦闘後完全回復.
"Experience Gain" attribute[]
Displayed as 取得経験値-60% or 取得経験値+30%. Negative value decreases the amount of experience character gains (can be found on Darksword Chaos), positive value increases it (can be found on some clothes that can be used by Brawler or Civilian classes).
"Damage reduction" attribute[]
Reduces damage taken by certain sources.
- Fire Damage -x% reduces damage taken from fire-based attacks. Found on Flame Charm or randomly on armors. Percentage may vary.
- Ice Damage -x% reduces damage taken from ice-based attacks. Found on Ice Charm or randomly on armors.Percentage may vary.
- Electric Damage -x% reduces damage taken from electric-based attacks. Found on Electric Charm or randomly on armors. Percentage may vary.
- Light Damage -x% reduces damage taken from light-based attacks. Found on Light Charm or randomly on armors. Percentage may vary.
- Darkness Damage -x% reduces damage taken from darkness-based attacks. Found on Dark Charm or randomly on armors. Percentage may vary.
- Magical Damage -20% reduces damage taken from all magical sources, including non-elemental. Found on various armors.
- Physical Damage -20% reduces damage taken by physical sources. Found on various armors.
- All Damage -20% reduces damage taken from all sources. Found on various armors.
"Saps 20% HP after battle" attribute[]
Displayed as 戦闘後HP2割減. Can be found on unique armor Orgarhythm. After battle, character loses 20% of total HP. Character cannot be knocked out outside of battle because of the Orgarhythm's efffects.
"Makes Assassination easier" attribute[]
Displayed as 暗殺成功率UP. Can be found on Kanami's Decapitation Blade. Increases success rate of Assassinate.
"Lowers Encounter rate" attribute[]
Same effect as Covert Movement: Increases the amount of steps you can take before entering a random battle. Found on the armor T-shirt.
"Effective Against X"[]
This makes a weapon deal additional damage against certain enemy types, such as Plants, Insects, Molluscs, Ancients, Spirits and Hannies. What type an enemy is can be seen when using Weakness Search on an enemy.
"Sitting Duck"[]
This skill is the same as Easy Target: Almost always targeted by the enemy whenever possible. Can be found on Commander's Uniform.
"Elemental" Attribute[]
Some weapons may deal elemental damage, such as the Flame Spear dealing fire damage and the Light Spear dealing light damage. May also appear randomly on weapons.
"Sexiness" and "Coolness" attributes[]
These skills are generally quite useless. Sexiness does nothing. Coolness only has an effect if a male custom character obtains the Star skill: If worn equipment has a total coolness stat of 5 or higher, gives an ATK/MAG/DEF/RSN buff at the start of battle. If total coolness is 4 or below, debuffs ATK/MAG/DEF/RSN instead.
Special Items[]
Special Items will be destroyed when you unequip them. They usually give straight bonuses to stats and are useable by all character classes.
When a character is "reset" due to the curse, the Special Item will be "absorbed" by them. It is possible to absorb only 5 items this way, next time the item will be compared to the 5 that were already absorbed and the one with the lowest rank will be lost. Absorbed items can be exchanged with current item by using Quest #13: Alice's Mansion (Quest #107: Alice's Support Center in the Japanese release). There is a strange bug that make the item slot look empty after being exchanged, but the stat boost is still effective.
After updating to Magnum, Rance's Special Item will be absorbed with a random event when moving between maps.
| Item | Name | Price | Rank | Effects |
|---|---|---|---|---|
 |
Manga Meat Bone (まんが肉骨だけ) |
200 | C | HP [+100] |
 |
Manga Meat (まんが肉) |
5000 | B | HP [+200] |
 |
Rabbit Stew (うさぎ鍋) |
10000 | A | HP [+300] |
 |
Health Up Set (体力UPセット) |
50000 | S | HP [+400] |
 |
Wooden Bear (木彫りベアー) |
200 | C | Attack [+50] |
 |
Steel bear (鋼鉄ベアー) |
5000 | B | Attack [+70] |
 |
Solid Gold Bear (純金ベアー) |
10000 | A | Attack [+100] |
 |
Attack Up Set (攻撃UPセット) |
50000 | S | Attack [+120] |
 |
Shiitake (しいたけ) |
200 | C | Defense [+20] |
 |
Protective Marimo (守りのまりも) |
5000 | B | Defense [+35] |
 |
Protective God (守り神様) |
10000 | A | Defense [+50] |
 |
Defense Up Set (防御UPセット) |
50000 | S | Defense [+120] |
 |
Well-Boned Fish (上手にむしられた魚) |
200 | C | Magic [+50] |
 |
Dora Cat's Bell (ドラ猫の鈴) |
5000 | B | Magic [+70] |
 |
Common Seahorse (タツノオトシドコロ) |
10000 | A | Magic [+100] |
 |
Magic Up Set (魔法UPセット) |
50000 | S | Magic [+120] |
 |
Stomachache Spirit (腹痛の精神) |
200 | C | Magic resistance [+20] |
 |
Cowlick (アホ毛) |
5000 | B | Magic resistance [+35] |
 |
Love Pet (愛フォーン) |
10000 | A | Magic resistance [+50] |
 |
Resistance Up Set (魔抵UPセット) |
50000 | S | Magic resistance [+70] |
 |
Miss Stake (はずれ棒) |
200 | C | Evasion [+4] |
 |
Nimble Feather (身軽の羽) |
5000 | B | Evasion [+7] |
 |
Dodgy Soup (避け茶漬け) |
10000 | A | Evasion [+10] |
 |
Evasion Up Set (回避UPセット) |
50000 | S | Evasion [+12] |
 |
Ritchie Rod (犬もあたる棒) |
200 | C | Accuracy [+4] |
 |
Piggyback Pal (おんぶちゃん) |
5000 | B | Accuracy [+7] |
 |
Moja Doll (もじゃ人形) |
10000 | A | Accuracy [+10] |
 |
Accuracy Up Set (命中UPセット) |
50000 | S | Accuracy [+12] |
 |
Inadequate Clock (足りない時計) |
200 | C | Speed [+3] |
 |
Quick, Strange Bug (素早い変な虫) |
5000 | B | Speed [+4] |
 |
Rocket Engine (ロケットエンジン) |
10000 | A | Speed [+5] |
 |
Speed Up Set | 50000 | S | Speed [+6] |
 |
Scratched-Up CD (傷だらけのCD) |
200 | C | Critical [+4] |
 |
Totally Broken Radio (壊れきったラジオ) |
5000 | B | Critical [+7] |
 |
Watch & Game (ゲーモッチ) |
10000 | A | Critical [+10] |
 |
Critical Up Set (必殺UPセット) |
50000 | S | Critical [+12] |
 |
Melting Ice (溶けちゃう氷) |
200 | C | Stun [+4] |
 |
Prizeless Snack (天使不在の空き箱) |
5000 | B | Stun [+7] |
 |
Shockwave Alberto Belt (衝撃のあるベルト) |
10000 | A | Stun [+10] |
 |
Stun Up Set (衝撃UPセット) |
50000 | S | Stun [+12] |
 |
Stretchy Noodles (のびのび麺) |
200 | C | Resilience [+4] |
 |
Canned Air (空気の缶詰) |
5000 | B | Resilience [+7] |
 |
Defiance Crown (耐性宝冠) |
10000 | A | Resilience [+10] |
 |
Resilience Up Set (耐性UPセット) |
50000 | S | Resilience [+12] |
 |
Skill Again (スキル戻し) |
100 | - | Re-initialize character's skills (like Rance's Abstinence Morurun curse) and give skill points equal to current level. Skill points and skills gained through Rance Castle events and Quest #134 will remain. Will not restock until used and subsequently removed from the Special Item slot. Old Game Versions: |
 |
Forbidden Talent (禁断才能) |
150 000 | - | Level Cap +20 Has a one time fixed location. It's in the chest behind the goal of Quest #126. More received from Quest #80 when gems are brought. Old Game Versions: |
|
Forbidden Talent - Weak (禁断才能ー弱) |
2000 + 1000x | - | Level cap +5 Found in #Quest 63. Available in the shop after Rance's castle is built. Can also be found from red orb fights and in chests throughout the game. Pre 2.082 TADA: Only increases level cap up to 35 with no effect afterwards. |
|
Forbidden Talent - V | - | - | Level cap +3 Found Randomly in World 3 from Treasure Chests and Red Orb fights. |
 |
Gal Monster Tamer Handbook (女魔物使いの教本) |
- | - | Enables holder to learn skill Familiar Knowledge, which allows them to use gal monsters. Civilians only. Obtained after beating Leopold in Quest #88. |
 |
Rocky Chunk (機々械々の欠片) |
- | - | Enables holder to learn the skill Rock On [カイカイUP] (1 bonus SP at level 5, 10, 15, etc). In Magnum, it add 10 SP - 1 SP for learning the skill = 9 SP immediately. Mostly found by encountering Pocky Rock 機々械々, a rare randomly encountered enemy. |
|
Broken Watch (壊れた時計) |
Athena starts with it | - | Treasure from Rance.
Does nothing. Cannot be removed. |
 |
Alice Coin (ALICE 銀貨) |
Exchanged for Soul Shackles in Quest #166 | - | Enables holder to learn Alice's Protection, a skill that gives +10% boost to ATK/DEF/MAG/RSN. |
Weapons[]
Short Sword Class[]
| Item | Name | Price | Rank | Effects | Level | Useable by | Comments |
|---|---|---|---|---|---|---|---|
 |
Dagger (短剣) |
250 | C | Attack [+20] | 0 | All classes except Gunner | |
 |
Accurate Dagger (よくあたる短剣) |
2000 | CC | Attack [+10] Accuracy [+80] (+50 in 2.082TADA) Talent |
0 | Ranger Civilian |
Buyable after clearing Quest #96. You can only own one at a time. |
 |
Shortsword (ショートソード) |
300 | C | Attack [+50] | 0 | Fighter Guard Ranger |
- |
 |
Ninja Knife (忍者小刀) |
- | CC | Attack [+110] Accuracy [+10] |
10 | Ranger | Can be found in a fixed red chest in A1 of Quest #90. |
 |
Rapier (レイピア) |
1000 | B | Attack [+150] | 20 | Fighter Guard Ranger |
Available at Frostbyne after Rance reaches Level 23. |
 |
Modified Rapier (レイピア改) |
3000 | B | Attack [+220] | 30 | Fighter Guard Ranger |
Available at Frostbyne after Rance reaches Level 32, but after buying a Rapier once and subsequently clearing any Quest. |
 |
Compound Rapier (連文節レイピア) |
- | BB | Attack [+180] Accuracy [+10] (+50 before 2.082 TADA) Speed [+5] |
25 | Ranger Civilian |
Found in a fixed red chest in C3 of Quest #72. |
 |
Lia's Whip (リアの鞭) |
- | BB | Attack [+50] Accuracy [+50] (+100 before 2.082TADA) |
0 | -
Lia only |
Lia starts with it. |
 |
Critical Knife (クリティカルナイフ) |
- | BB | Attack [+280] Critical [+40] |
25 | Ranger Civilian |
Found in a fixed red chest in A4 of Quest #48. |
 |
Villa Blade ビラブレイド |
7000 | A | Attack [+320] | 40 | Fighter Guard Ranger |
Available at Frostbuy when Rance is at Level 43. |
 |
Cuckri (スカートメクリ) |
- | AA | Attack [+320] Magic [+300] Speed [+5] |
45 | Fighter Guard Ranger Civilian |
From treasure chests only. In Magnum, also rewarded for filling out the Magnum Gauge in Quest #48. |

|
Over Blade (オバブレイド) |
- | AA | Attack [+390] Attribute: Dark Talent R |
50 | Fighter Ranger |
- |
Sword Class[]
| Item | Name | Price | Rank | Effects | Level | Useable by | Comments |
|---|---|---|---|---|---|---|---|
 |
Longsword (ロングソード) |
350 | C | Attack [+70] Accuracy [-20] |
2 | Fighter Guard |
|
 |
Lightning Sword (イナズマの剣) |
- | CC | Attack [+120] Attribute: Electric |
10 | Fighter | Found in A2 of Quest #90. |
 |
Zombie Sword (ゾンビーソード) |
- | CC | Attack [+130] Effective against Zombies Effective against Insects |
10 | Fighter | Found in B2 of Quest #62. |
 |
Buster Sword (バスターソード) |
1500 | B | Attack [+200] Accuracy [-20] |
22 | Fighter Guard |
Available at Frostbuy when Rance is at Level 23. |
 |
Modified Buster Sword (バスターソード改) |
4000 | B | Attack [+300] Accuracy [-20] |
32 | Fighter Guard |
Available when Rance is at Level 32, but after buying a Buster Sword once and subsequently clearing any Quest. |
 |
Katana (日本刀) |
- | BB | Attack [+350] Critical [+10] Accuracy [+20] (no base accuracy bonus since 2.082TADA) Talent |
32 | Fighter | Nozomi starts with one. |
|
Paper Cutter (かみ斬り) |
- | BB | Attack [+250] Accuracy [+50] Critical [+10] |
32 | Fighter | Obtained from seeing Katsuko's A Day in Cidade event. |
 |
Iceberg Sword (氷山の剣) |
- | BB | Attack [+400] Accuracy [-25] Attribute: Ice |
32 | Fighter Ranger* |
*A variation also available to Rangers is found in Quest #171 Bishop's trap. That version has no accuracy drop and comes with Body Boost 10%. |
 |
Super Sword (スーパーソード) |
9000 | A | Attack [+500] Accuracy [-20] |
40 | Fighter Guard |
Available at Frostbuy when Rance is at Level 43. |

|
Ultra Sword (ウルトラソード) |
- | AA | Attack [+600] Magic [+600] Accuracy [-20] |
40 | Fighter Guard |
|
 |
By Road (バイ・ロード) |
- | AA | Attack [+450] Accuracy [-40] |
40 | Fighter | Rick's weapon. He starts with it upon joining. |
 |
Hideo's Sword (ヒデオの剣) |
- | AA | Attack [+700] Accuracy [-20] |
52 | Fighter Guard |
|
 |
Hero's Sword (英雄の剣) |
- | AA | Attack [+900] Defense [-100] Resistance [-100] |
62 | Fighter |
Blunt Class[]
| Item | Name | Price | Rank | Effects | Level | Useable by | Comments |
|---|---|---|---|---|---|---|---|
 |
Club (こんぼう) |
50 | C | Attack [+40] Accuracy [-30] Stun [+25] |
0 | All classes except Gunner | |
 |
Omikuji Box (お神籤箱) |
- | CC | Attack [+100] Accuracy [-100] |
0 |
Copandon only |
Copandon starts with it. |
Hammer Class[]
| Item | Name | Price | Rank | Effects | Level | Useable by | Comments |
|---|---|---|---|---|---|---|---|
 |
Strongman Hammer (力持ちハンマー) |
260 | C | Attack [+200] Accuracy [-30] (-50 before 2.082TADA) Stun [+30] |
5 | Fighter Guard Healer |
|
 |
Priest's Mace (神官のメイス) |
980 | C | Attack [+150] Accuracy [+30] (no base accuracy bonus since 2.082TADA) Effective against Spirits |
3 | Healer | |
|
Killer Hammer (必殺のハンマー) |
- | CC | Attack [+70] Accuracy [-20] (-10 in 2.082TADA) Critical [+30] Talent |
0 | Fighter | Cessna starts with one. |
 |
Dewdrop Axe (玉露の斧) |
- | CC | Attack [+400] (350 in 2.082TADA) Accuracy [-30] HP [+50] |
15 | Fighter | Found in Quest #61. |
 |
Hammer B (ハンマーB) |
900 | B | Attack [+500] Accuracy [-30] (-70 before 2.082TADA) Stun [+20] |
20 | Fighter Guard Healer |
Available at Frostbuy when Rance is at Level 23. |
 |
Modified Hammer B (ハンマーB改) |
3000 | B | Attack [+700] Accuracy [-30] (-70 before 2.082TADA) Stun [+20] |
30 | Fighter Guard Healer |
Available at Frostbuy when Rance reaches Level 32, but after buying a Hammer B once and subsequently clearing any Quest. |
 |
Pastor's Mace (神父のメイス) |
1580 | B | Attack [+500] Accuracy [+30] (no base accuracy bonus since 2.082TADA) Defense [+50] Effective against Spirits |
25 | Healer | Available in A3 of Quest #90. |
|
Pastor's Mace D | - | B | Attack [+700] Effective against Hannies Effective against Spirits Effective against Ancients |
25 | Healer | Drops once in C4 of Quest #174 Mula Test Part 2. |
 |
Mollusc Crusher (軟体潰し) |
- | BB | Attack [+700] Accuracy [-30] (+30 before 2.082TADA) Defense [+50] Effective against Molluscs |
25 | Fighter Guard Healer |
|
 |
Big Hammer (ビッグハンマー) |
6000 | A | Attack [+800] Accuracy [-30] (-90 before 2.082TADA) Stun [+20] |
40 | Fighter Guard Healer |
Available at Frostbuy when Rance is at Level 43. |
|
Bishop's Mace (司教のメイス) |
- | AA | Attack [+800] Magic [+500] Attribute: Dark Effective against Spirits |
45 | Healer | |
 |
Becky (ベッキー) |
- | AA | Attack [+1000] Accuracy [-40] (-99 before 2.082TADA) Stun [+30] Defense [-99] |
45 | Fighter Guard Healer |
Randomly found. |
 |
10-Ton Hammer (10tハンマー) |
- | AA | Attack [+1200] Accuracy [-60] |
50 | Fighter Guard Healer |
Spear Class[]
| Item | Name | Price | Rank | Effects | Level | Useable by | Comments |
|---|---|---|---|---|---|---|---|
 |
Warrior's Spear (戦士の槍) |
260 | C | Attack [+120] Speed [-5] Accuracy [+10] |
5 | Fighter Guard |
|
 |
Poison Dango (毒だんご) |
- | C | Aplies poison on contact Attack [+100] Speed [-5] |
0 |
Kou only |
Kouhime starts with it. Poisons enemy 100% of the time when using physical attacks. |
 |
Flame Spear (炎の槍) |
- | CC | Attack [+200] Speed [-5] Accuracy [+10] Attribute: Fire |
12 | Fighter Guard |
|
 |
Spear (スピア) |
1500 | B | Attack [+200] Speed [-5] (-10 before 2.082TADA) Accuracy [+10] |
22 | Fighter Guard |
Available at Frostbuy when Rance is at Level 23. |
 |
Modified Spear (スピア改) |
5500 | B | Attack [+280] | 32 | Fighter Guard |
Available at Frostbuy when Rance reaches Level 32, but after buying a Spear once and subsequently clearing any Quest. |
 |
Light Spear (光の槍) |
- | BB | Attack [+420] Speed [-10] (-5 in 2.082TADA) Accuracy [+10] Attribute: Light |
27 | Fighter Guard |
Maris starts with one. |
 |
Halberd (ハルバート) |
6800 | A | Attack [+550] Speed [-5] (-15 before 2.082TADA) Accuracy [+10] |
40 | Fighter Guard |
Available at Frostbuy when Rance is at Level 43. |

|
Halberd S (ハルバートS) |
A | Attack [+650] Speed [-5] Accuracy [+10] Body Boost: [5%] |
40 | Fighter Guard |
||
 |
Anguirus (アンギラス) |
- | AA | Attack [+800] Speed [-5] (-15 before 2.082TADA) Defense [-30] |
44 | Fighter Guard |
Arms Arc starts with it. |
Bow Class[]
| Item | Name | Price | Rank | Effects | Level | Useable by | Comments |
|---|---|---|---|---|---|---|---|
 |
Shortbow (ショートボウ) |
400 | C | Attack [+40] Accuracy [+20] (no base accuracy bonus since 2.082TADA) |
0 | Gunner | |
 |
Ear hunting Boomerang (耳狩りブーメラン) |
- | CC | Attack [+44] Accuracy [+30] Effective against Kalar |
3 | Gunner | Found in Quest #69. |
 |
Elite Kalar Bow (カラー精鋭弓) |
- | CC | Attack [+80] Accuracy [+10] |
10 | Gunner | Aegis starts with one. More found in A4 of Quest #90. |
 |
Longbow (ロングボウ) |
1900 | B | Attack [+150] Accuracy [+20] (no base accuracy bonus since 2.082TADA) |
20 | Gunner | Available at Frostbuy when Rance is at Level 23. |
 |
Modified Longbow (ロングボウ改) |
5000 | B | Attack [+250] Accuracy [+20] (no base accuracy bonus since 2.082TADA) |
30 | Gunner | Available at Frostbuy when Rance reaches Level 32, but after buying a Longbow once and subsequently clearing any Quest. |
 |
Insect-killer Bow (虫殺しの弓) |
- | BB | Attack [+250] Accuracy [+35] (no base accuracy bonus since 2.082TADA) Effective against Insects |
29 | Gunner | Found in D4 of Quest #64. |
 |
Ancient Hunting Bow (古きを狩る弓) |
- | BB | Attack [+270] Accuracy [+35] (no base accuracy bonus in 2.082TADA) Effective against Ancients |
29 | Gunner | Zima starts with one. |
 |
Power Attack Bow (パワーアタックボウ) |
8800 | A | Attack [+350] Accuracy [+25] (no base accuracy bonus since 2.082TADA) |
40 | Gunner | Available at Frostbuy when Rance is at Level 43. |
 |
Artisan's Bow (匠の弓) |
- | AA | Attack [+450] Accuracy [+10] |
50 | Gunner | |

|
Giga Attack Bow (ギガアタックボウ) |
- | AA | Attack [+500] Defense [+5] Resilience [+5] |
50 | Gunner |
Gun Class[]
| Item | Name | Price | Rank | Effects | Level | Useable by | Comments |
|---|---|---|---|---|---|---|---|
 |
Arquebus (火縄銃) |
8800 | - | Attack [+400] Speed [+10] |
0 | Gunner | Each level of Ranged Attack can be used once per battle. Yuzumi starts with one. More can be bought at Frostbuy after she joins. |
|
Modified Arquebus (火縄銃改) |
- | - | Attack [+600] Speed [+20] Talent |
0 | Gunner | Each level of Ranged Attack can be used once per battle. Can only possess one. |
 |
Tulip 1 (チューリップ一号) |
- | - | Attack [+500] Accuracy [+20] Stun [+20] |
0 |
Maria only |
Maria starts with it. |
Glove Class[]
| Item | Name | Price | Rank | Effects | Level | Useable by | Comments |
|---|---|---|---|---|---|---|---|
 |
Glove (グローブ) |
100 | C | Attack [+5] Accuracy [+10] (+20 before 2.082TADA) Critical [+30] (no basic crit+ since 2.082TADA) |
0 | Brawler | |
 |
Good Will Punch (善意のパンチ) |
- | CC | Attack [+5] Accuracy [+10] (+20 before 2.082TADA) |
0 | Brawler | Donation(寄付) +1 per several hits. Hits also count when using different attacks than punches: with Kisara's card magic attacks and regular magic attacks also count. |
 |
Knuckle (ナックル) |
900 | B | Attack [+50] Accuracy [+10] (+20 before 2.082TADA) Critical [+30] (no basic crit+ since 2.082TADA) |
20 | Brawler | Available at Frostbuy when Rance is at Level 23. |
 |
Modified Knuckle (ナックル改) |
2000 | B | Attack [+100] Accuracy [+20] (+10 in 2.082TADA) Critical [+30] (no basic crit+ in 2.082TADA) |
30 | Brawler | Available at Frostbuy when Rance reaches Level 32, but after buying a Knuckle once and subsequently clearing any Quest. |

|
Config (コンフィグ) |
- | BB | Attack [+50] Accuracy [+10] (+20 before 2.082TADA) Critical [+60] (no basic crit+ in 2.082TADA) Talent |
20 | Brawler | |
 |
Metal Glove (メタルグローブ) |
3200 | A | Attack [+200] Accuracy [+10] (+20 before 2.082TADA) Critical [+30] (no basic crit+ in 2.082TADA) |
40 | Brawler | Available at Frostbuy when Rance is at Level 43. |
 |
Killfig (惨殺フィグ) |
- | AA | Attack [+100] Accuracy [+10] Instant death to "too weak" enemies (when the quest no longer gives the character full exp).1 75% chance to recover skill usage when dealing a killing blow.2 |
40 | Brawler | 1 Instant kill ability is deleted from 1.6/Magnum onwards. Works up to 1.15 only. 2 Skill recovery ability requires v2.082 TADA update 02/06 or newer. This weapon thus has no special ability between Magnum v2.00 and v2.082 TADA 02/06. |

|
Veteran Glove (ベテラングローブ) |
AA | Attack [+400] Accuracy [+10] |
80 | Brawler | ||
 |
Puncher (パンチャー) |
- | S | Attack [+1] Stun [+80] Accuracy [+50] |
0 | Crane only | Crane starts with it. |
Cane Class[]
| Item | Name | Price | Rank | Effects | Level | Useable by | Comments |
|---|---|---|---|---|---|---|---|
 |
Haies Staff (ハイエスの杖) |
298 | C | Magic [+30] | 0 | Sorcerer Healer |
|
 |
Magic Ice Stick (魔法のアイスの棒) |
- | CC | Magic [+60] Attribute: Ice |
11 | Sorcerer Healer |
In B5 of Quest #90. |
 |
Sylph Staff (シルフの杖) |
1980 | B | Magic [+120] | 20 | Sorcerer Healer |
Available at Frostbuy when Rance is at Level 23. |
 |
Shining LED Staff (輝くLEDの杖) |
- | BB | Magic [+180] | 24 | Sorcerer Healer |
|
 |
Gaia Staff (ガイヤの杖) |
6900 | A | Magic [+250] | 40 | Sorcerer Healer |
Available at Frostbuy when Rance is at Level 43. |

|
Boss's Staff (長の杖) |
- | A | Magic [+300] Attribute: Dark Body Boost: [5%] |
40 | Sorcerer Healer |
Armor[]
Clothes Class[]
| Item | Name | Price | Rank | Effects | Level | Useable by | Comments |
|---|---|---|---|---|---|---|---|
 |
Adventurer Outfit (冒険服) |
100 | C | Defense [+20] Resistance [+20] |
0 | All classes | |
 |
T-Shirt (Tシャツ) |
100 | CC | Defense [+1] Resistance [+1] Lowers Encounter Rate |
0 | All classes | Available at Frostbuy as a random donation reward. |
 |
Miko Outfit (巫女服) |
- | CC | Defense [+3] Resistance [+3] Partial Recovery After Battle |
0 | All classes | |
 |
Sailor Uniform (セーラ服) |
- | CC | Defense [+35] Resistance [+40] Resilience [+10] Sexiness [+1] |
0 |
Sachiko only |
Sachiko starts with it. |
 |
Maid Outfit | - | CC | Defense [+40] Resistance [+13] Accuracy [+10] |
- | Gunner Healer Ranger Brawler |
Tama and Biscuitta start with one. |
 |
Tarampi Suit (タランピスーツ) |
- | BB | Defense [+75] Resistance [+75] Coolness [+1] |
0 | Civilian | |
 |
Black Nurse Outfit (黒看護服) |
- | BB | Attack [+100] Defense [+80] Resistance [+80] |
0 | Healer | |
 |
White Nurse Outfit (白看護服) |
- | BB | Magic [+100] Defense [+80] Resistance [+80] |
0 | Healer | |
 |
High Grade Adventurer Outfit (上級冒険服) |
10000 | A | Defense [+70] Resistance [+70] Body boost [5%] Experience Gain [+10%] |
40 | All classes | Random donation reward, when you have completed high difficulty quests. |
 |
Commander's Uniform (指揮官着) |
30000 | A | Defense [+50] Resistance [+50] Body boost [5%] Sitting Duck |
40 | All classes | Random donation reward, when you have completed high difficulty quests. Sitting Duck does the same thing as the skill Easy Target, making the character the primary target of enemy attacks. |
Leather Armor Class[]
| Item | Name | Price | Rank | Effects | Level | Useable by | Comments |
|---|---|---|---|---|---|---|---|
 |
Leather Armor (革鎧) |
300 | C | Defense [+30] Resistance [+30] |
0 | Fighter Gunner Healer Ranger Civilian |
|
 |
Leather Armor XA (革鎧XA) |
- | CC | Defense [+45] Resistance [+45] Resilience [+10] |
0 | Fighter Gunner Healer Ranger Civilian |
|
|
Resist Armor (レジスト鎧) |
1200 | CC | Defense [+20] Resistance [+20] Physical damage [-20%] Magical damage -20%] |
35 | All | Available at Frostbuy when Rance is at level 49 and seen Frostbyne map transition dialogue scene (maybe needs Tama's too). |
 |
Ninja Suit (忍者服) |
- | CC | Defense [+45] Resistance [+80] Evasion [+10] Resilience [-10] |
0 | Ranger | |
 |
Tough Leather Armor (硬革鎧) |
1000 | B | Defense [+60] Resistance [+60] |
20 | Fighter Gunner Healer Ranger Civilian |
Crook Mofus starts with one. |
 |
Tough Leather Armor XB (硬革鎧XB) |
- | BB | Defense [+80] Resistance [+80] Resilience [+20] |
20 | Fighter Gunner Healer Ranger Civilian |
|
 |
Cultux (キュルタックス) |
- | BB | Defense [+120] Resistance [+50] Speed [+2] Electric damage [-60%] |
20 | Gunner Ranger Civilian |
88 Defense and 10 Resistance in earlier versions. |
 |
Composite Leather Armor (複合革鎧) |
5000 | A | Defense [+100] Resistance [+100] Resilience [+20] (Not available in 2.082TADA) |
40 | Fighter Gunner Healer Ranger Civilian |
Available at Frostbuy when Rance is at Level 43. |
 |
Modified Composite Leather Armor (複合革鎧KAI) |
20000 | AA | Defense [+180] Resistance [+180] Physical damage [-20%] |
55 | Fighter Gunner Healer Ranger Civilian |
Available at Frostbuy when Rance is at level 49 and seen Frostbyne map transition dialogue scene (maybe needs Tama's too) |
 |
DR Leather Armor (DR革鎧) |
- | AA | Defense [+100] Resistance [+100] Attack [+100] Fire damage [-50%] Coolness [+1] |
45 | Fighter Gunner Healer Ranger Civilian | |
 |
Quintessential Ninja (ザ・忍者) |
1000 | AA | Defense [+120] Resistance [+150] Evasion [+30] Speed [+10] Body Boost [5%] |
30 | Ranger | Random donation reward, when you have completed high difficulty quests. |
Iron Armor Class[]
| Item | Name | Price | Rank | Effects | Level | Useable by | Notes |
|---|---|---|---|---|---|---|---|
 |
Light Armor (ライトアーマー) |
800 | Iron Armor C | Defense [+40] Resistance [+20] Evasion [-20] |
5 | Fighter Guard |
|
 |
Light Armor XA (ライトアーマーXA) |
- | Iron Armor CC | Defense [+60] Resistance [+30] Evasion [-20] |
5 | Fighter Guard |
|
 |
Iron Armor (アイアンアーマー) |
2000 | Iron Armor B | Defense [+80] Resistance [+40] Evasion [-40] |
22 | Fighter Guard |
|
 |
Iron Armor X (アイアンアーマー X) |
- | Iron Armor BB | Defense [+100] Resistance [+60] Evasion [-40] |
22 | Fighter Guard |
|
 |
Warrior Armor (武者鎧) |
- | Iron Armor BB | Defense [+80] Resistance [+40] Attack [+40] |
20 | Fighter | |
 |
Crystal Armor (クリスタル鎧) |
- | Iron Armor BB | Defense [+30] Resistance [+400] Evasion [-40] |
22 | Fighter Guard Civilian |
|

|
Leazas Red General Armor | - | Iron Armor A | Defense [+221] Resistance [+221] Attack [+100] Speed [+2] |
40 | Fighter | Rick starts with one. |
 |
Coarse Armor (コースアーマー) |
8000 | Iron Armor A | Defense [+200] Resistance [+100] Evasion [-60] |
40 | Fighter Guard |
Available at Frostbuy when Rance is at level 43. |
 |
Modified Coarse Armor (コースアーマーKAI) |
28000 | Iron Armor AA | Defense [+250] Resistance [+150] Speed [-5] Physical damage [-20%] |
55 | Fighter Guard Healer |
Available at Frostbuy when Rance is at level 49 and have seen Frostbyne's map transition dialogue scene (maybe needs Tama's too). |
 |
Oda Armor (織田鎧) |
Kouhime starts with it | Iron Armor AA | Defense [+160] Resistance [+160] Speed [-15] |
0 | Kouhime only | Kou starts with it. |
 |
Heavy Armor (重量鎧) |
- | Iron Armor AA | Defense [+200] Resistance [+150] Speed [-25] Evasion [-100] |
37 | Guard | |
 |
Bikini Armor (ビキニ鎧) |
- | Iron Armor AA | Defense [+98] Resistance [+98] Resilience [-100] Physical Damage[-20%] Magical Damage[-20%] |
37 | Guard | |
 |
Hell Setter (ヘルセッター) |
- | Iron Armor AA | Defense [+120] Resistance [+80] Attack [+50] Evasion [-80] |
40 | Fighter | Arms starts with one. |

|
Sengoku Rance Armor | 98000 | Iron Armor AA | Defense [+220] Magic resistance [+220] All Damage [-20%] Body Boost [10%] Coolness [+5] |
50 | Fighter | Random donation reward, when you have completed high difficulty quests. |
Cloth Armor Class[]
| Item | Name | Price | Rank | Effects | Level | Useable by | Notes |
|---|---|---|---|---|---|---|---|
 |
Prelan Robe (プレランローブ) |
250 | Cloth Armor C | Defense [+25] Resistance [+60] |
0 | Sorcerer Healer Civilian |
|
 |
Loose Robe (ルースローブ) |
1200 | Cloth Armor B | Defense [+50] Resistance [+100] |
20 | Sorcerer Healer Civilian |
|

|
Split Robe (?) |
- | Cloth Armor BB | Defense [+45] Resistance [+95] Speed [+10] |
23 | Sorcerer Healer Civilian |
|
 |
High Grade Loose Robe (高級ルースローブ) |
4800 | Cloth Armor A | Defense [+120] Resistance [+200] Magical damage [-20%] |
40 | Sorcerer Healer Civilian |
Available at Frostbuy when Rance is at level 43. |
 |
Black Robe (黒ローブ) |
24800 | Cloth Armor AA | Defense [+200] Resistance [+200] Magical damage [-20%] |
55 | Sorcerer Healer Civilian |
Available at Frostbuy when Rance is at level 49 and have seen Frostbyne map transition dialogue scene (maybe needs Tama's too). |
 |
Holy Robe | 4800 | Cloth Armor AA | Defense [+400] Resistance [+400] |
40 | Healer | Random donation reward, when you have completed high difficulty quests. |
 |
Lia's Clothes (リアの服) |
- | Cloth Armor AA | Defense [+100] Resistance [+100] Full Recovery After Battle Sexiness [+1] |
0 | Lia only | Lia starts with it. |
 |
Magic Idiot (マホウバカ) |
- | Cloth Armor AA | Defense [+1] Resistance [+1] Magic [+100] |
40 | Sorcerer Healer Civilian |
Gi Class[]
| Item | Name | Price | Rank | Effects | Level | Useable by | Notes |
|---|---|---|---|---|---|---|---|
 |
White Belt Gi (白帯道場着) |
180 | Gi C | Defense [+10] Resistance [+10] Experience Gain [+30%] |
10 | Brawler Civilian |
|
 |
Black Belt Gi (黒帯道場着) |
700 | Gi B | Defense [+25] Resistance [+25] Experience Gain [+30%] |
30 | Brawler Civilian |
|
 |
China Dress (チャイナ服) |
- | Dogi BB | Defense [+25] Resistance [+25] Experience Gain [+30%] Evasion [+30] Sexiness [+1] |
25 | Brawler Civilian |
|
 |
Red Belt Gi (赤帯道場着) |
3000 | Gi A | Defense [+50] Resistance [+50] Experience Gain [+30%] |
40 | Brawler Civilian |
Available at Frostbuy when Rance is at Level 43. |
 |
Initiation Clothes (皆伝着) |
23000 | Gi AA | Defense [+100] Resistance [+100] Experience Gain [+30%] Physical damage [-20%] |
60 | Brawler Civilian |
Available at Frostbuy when Rance is at level 49 and have seen Frostbyne's map transition dialogue scene (maybe needs Tama's too). |
 |
Killer Gi (必殺道着) |
- | Gi AA | Defense [+1] Resistance [+1] Attack [+88] Critical [+50] |
40 | Brawler Civilian |
Special[]
| Item | Name | Price | Rank | Effects | Level | Useable by |
|---|---|---|---|---|---|---|
 |
Stealth Suit (ステルススーツ) |
- | - | Defense [+10] Resistance [+10] |
0 | Crane only. Cannot be removed. |
Items[]
| Item | Name | Price | Useable by | Effects | Comment |
|---|---|---|---|---|---|
 |
Ibeprofun Box (世色癌箱) |
980 | All classes | Grants the item skill Use Ibeprofun. Heals 50% HP of one ally. Grants 1 use per Quest. |
|
 |
Ibeprofun EX Box (世色癌EX箱) |
19800 | All classes | Grants the item skill Use Ibeprofun. Heals 50% HP of one ally. Grants 2 uses per Quest. |
|
 |
Ibeprofun EX+ Box (世色癌EX+箱) |
- | All classes | Grants the item skill Use Ibeprofun. Heals 50% HP of one ally. Grants 3 uses per Quest. |
|
 |
Epinephrend (蘇生薬) |
2000 | All classes, except Sorcerer and Healer | Grants the item skill Use Epinephrend. Revive one ally. Grants 1 use per Quest. |
|
 |
Magic Key (魔法の鍵) |
7700 | All classes, except Ranger | Grants the item skill Use Key. Opens chests at an 80% success rate. Has unlimited uses. |
|
 |
Capture Rope (捕獲ロープ) |
1500 | All classes | Grants the item skill Capture. Capture gal monsters, success chance depends on their remaining HP. Grants 2 uses per Quest. |
|
|
Strong Capture Rope (頑丈捕獲ロープ) |
- | All classes | Grants the item skill Capture. Capture gal monsters, success chance depends on their remaining HP. Grants 8 uses per Quest. |
|
 |
Resistance Ring (魔抵の指輪) |
1000 | All classes | Resistance [+10] | Versions randomly obtained from Quests are able to reach way higher stats and can drop with additional bonuses. |
 |
Evasion Boots (回避のブーツ) |
1000 | All classes | Evasion [+5] | Versions randomly obtained from Quests are able to reach way higher stats and can drop with additional bonuses. |
 |
Resilience Necklace (耐性のネックレス) |
1000 | All classes | Resilience [+10] | Versions randomly obtained from Quests are able to reach way higher stats and can drop with additional bonuses. |
 |
Additional Armor (追加装甲) |
1000 | All classes | Defense [+10] | Versions randomly obtained from Quests are able to reach way higher stats and can drop with additional bonuses. Available in Quest #124 with much better stats. |
 |
Cardboard Armor (だんぼーる装甲) |
- | All classes, except Guard and Ranger | Defense [+15] | Reward from Quest #116. |
 |
Flame Charm (炎のお守り) |
- | All classes | Fire damage reduced by 80% | |
 |
Ice Charm (氷のお守り) |
- | All classes | Ice damage reduced by 80% | |
 |
Electric Charm (雷のお守り) |
900 | All classes | Electric damage reduced by 80% | Versions randomly obtained from Quests are able to reach way higher stats and can drop with additional bonuses. |
 |
Light Charm (光のお守り) |
- | All classes | Light damage reduced by 80% | |
 |
Dark Charm (闇のお守り) |
900 | All classes | Dark damage reduced by 80% | Versions randomly obtained from Quests are able to reach way higher stats and can drop with additional bonuses. |
 |
Accuracy Boots (命中の靴) |
500 | All classes | Accuracy [+15] | You can also buy a +30 Accuracy version once for 2000 gold. Versions randomly obtained from Quests are able to reach way higher stats and can drop with additional bonuses. |
 |
FastPass (優先座席) |
800 | All classes | Speed [+20] only at the start of combat | Useful to get very slow characters started earlier (like Kouhime). |
 |
Reddish Feather (赤っぽい羽) |
1500 | - | Makes Arlcoate Marius appear in Quest #16. | Can be donated or sold after obtaining Arlcoate. |
 |
Character Ticket (キャラチケット) |
1000+A | - | Allows you to create one custom character through Quest #129. | A is number of times bought x1000. |
 |
Mr. Hiroshi (ヒロシ君) |
- | Brawler Civilian |
Resilience [+20] Evasion [-30] Defense [+5] ([+100] after completing Quest #156) |
Cursed tower shield that changes class to Guard when equipped. Cannot be removed. Sachiko starts with it. |
 |
Poison Mask (毒マスク) |
- | All classes | Immunity to poison | Found in Quest #61. |
 |
Box of Cakes (菓子折) |
- | - | Does nothing. | Acquired at the end of the first quest (#25). |
 |
Soul Shackle (魂の枷) |
- | All classes | When equipped the character leaves the party after the next fight. | Can be exchanged for Alice Coins through Quest #166. Drops from random contaminated fights once the story has progressed far enough. May also drop randomly at the end of Quest #86. |
 |
Bloomers (ブルマー) |
- | All classes | Accuracy [+10]
Evasion [+10] Stun [+10] Resilience [+10] |
Can drop with additional bonuses |
 |
Hanny Goods | - | All classes | Nullifies Hanny Attacks | |
 |
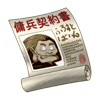
Scroll (Sel) (目録(セル)) |
- | Defeat 5 gal monsters, while someone in the party has it equipped, to get Sel Catchgolf. | May randomly be found in a red chest during quests. | |
|
Scroll (Elenoa) ( 目録 (エレノア)) |
- | Defeat 6 gal monsters, while someone in the party has it equipped, to get Elenoa Ran. | May randomly be found in a red chest during quests.
Alternatively, if the player has cleared Quest #76 and the scroll has yet to be obtained, it can be found in a green chest in Quest #122. | |
|
Scroll (Mill) (目録(ミル)) |
- | Defeat 20 gal monsters, while someone in the party has it equipped, to get Mill Yorks. | May randomly be found in a red chest during quests.
Alternatively, if the player has cleared Quest #76 and the scroll has yet to be obtained, it can be found in a green chest in Quest #123. | |
|
Scroll (Karma) ( 目録 (カルマ)) |
- | Defeat 10 gal monsters, while someone in the party has it equipped, to get Karma Atlanger. | May randomly be found in a red chest during quests. | |
|
Scroll (Shitomone) ( 目録 (シトモネ)) |
- | Defeat 10 gal monsters, while someone in the party has it equipped, to get Shitomone Chappie. | May randomly be found in a red chest during quests. | |
|
Scroll (Wichita) (目録(ウィチタ)) |
- | Defeat 20 gal monsters, while someone in the party has it equipped, to get Wichita Skate. | May randomly be found in a red chest during quests. | |
|
Scroll (Nozomi) (目録(ノゾミ)) |
Defeat 20 gal monsters, while someone in the party has it equipped, to get Nozomi Okita. | May randomly be found in a red chest during quests. | ||
 |
Lotion A (ローションA) |
- | Required alongside Lotion B and C to do Quest #85, which unlocks Atago Macatt.
Again required for Quest #153. |
From fixed green chest next to escape teleporter, right side of area 2 for Quest 66, Love Letter.
In Magnum v.2.050 random loot from treasure chests, especially red ones (red ones confirmed) (I got all in quest 37). Confirmed to have dropped from a red chest in Quest #62. | |
|
Lotion B (ローションB) |
- | Required alongside Lotion A and C to do Quest #85, which unlocks Atago Macatt.
Again required for Quest #153. |
From fixed green chest next to escape teleporter, right side of area 2 for quest 66, Love Letter.
In Magnum v.2.050 random loot from treasure chests especially red ones (red ones confirmed) ( I got all in quest 37). Confirmed to have dropped from a red chest in quest #62. | |
|
Lotion C (ローションC) |
- | Required alongside Lotion A and B to do Quest #85, which unlocks Atago Macatt.
Again required for Quest #153. |
From fixed green chest next to escape teleporter, right side of area 2 for Quest 66, Love Letter.
In Magnum v.2.050 random loot from treasure chests especially red ones (red ones confirmed) (I got all in quest 37). Confirmed to have dropped from a red chest in quest #62. | |
 |
Kugu Piece A (クグの破片A) |
- | Collect all pieces once to be able to complete Quest #117.
Then collect all pieces again to be able to complete Quest #118. Then collect all pieces again to be able to complete Quest #119. Finally, once you enter the Magnum storyline, collect all pieces again to be able to complete Quest #181. |
First time found in Malgrid Dungeon 1st Stratum (#121) at C3.
Second time found in Malgrid Dungeon 3rd Stratum (#123) at D3. Third time found in Malgrid Dungeon 5th Stratum (#125) at D1. Fourth time found in Malgrid Dungeon 10th Stratum at (#146) at A2. | |
 |
Kugu Piece B (クグの破片B) |
- | Collect all pieces once to be able to complete Quest #117.
Then collect all pieces again to be able to complete Quest #118. Then collect all pieces again to be able to complete Quest #119. Finally, once you enter the Magnum storyline, collect all pieces again to be able to complete Quest #181. |
First time found in Malgrid Dungeon 2nd Stratum (#122) at A4.
Second time found in Malgrid Dungeon 4th Stratum (#124) at A4. Third time found in Malgrid Dungeon 6th Stratum (#126) at A3. Fourth time found in Malgrid Dungeon 10th Stratum at (#146) at B2. | |
 |
Kugu Piece C (クグの破片C) |
- | Collect all pieces once to be able to complete Quest #117.
Then collect all pieces again to be able to complete Quest #118. Then collect all pieces again to be able to complete Quest #119. Finally, once you enter the Magnum storyline, collect all pieces again to be able to complete Quest #181. |
First time found in Malgrid Dungeon 2nd Stratum (#122) at B3.
Second time found in Malgrid Dungeon 4th Stratum (#124) at B1. Third time found in Malgrid Dungeon 6th Stratum (#126) at B2. Fourth time found in Malgrid Dungeon 10th Stratum at (#146) at C2. | |
 |
Tama's Underwear (タマの下着) |
1000 | When bought, makes Quest #82 show up in the Quest list after completing any Quest. | Can be donated or sold after buying Tama's Dress. | |
|
Tama's Dress (タマの洋服) |
1000 | Required to complete Quest #82. | Only available if Tama's underwear has been bought. Can be donated or sold after completing Quest #82. | |
 |
Mercenary Tama (傭兵タマ) |
1000 | Tama will join you. | Only available if Quest #82 is completed. Can be donated or sold after Tama joins. | |
 |
Mercenary Hag (傭兵ばばあ) |
1000 | Frostbyne will join you. | Only available if Quest #82 is completed. Can be donated or sold after Frostbyne joins. | |
 |
Harumaki (はるまき) |
- | - | -
Lia's pet. |
A huge lightning dragon which has become small for some reason. Lia starts with it. Does nothing. |
 |
Stealth Device (ステルス装置) |
- | Ranger | Grants the item skill Stealth. Reduces chance of being targeted. Increases damage. After you attack might no longer remain hidden. Increases Assassination rate? Grants 3 uses per Quest. Cannot be removed. |
Crane starts with it. |
 |
Portrait~ (遺え~い) |
- | Brawler Civilian |
Cannot be removed. | Shows a picture of Milli Yorks, Mill's older sister. Mill starts with it. |
 |
Abnormal Bloomers (異常ブルマー) |
- | All classes | At max level, has chance for dungeon event to increase level cap by one. Effect activates when transitioning to a new block in a dungeon. Low priority. |
Found during Quest #143: Strange Hive, on block D3, In a green star event.
Quest #176 The Shepherd's Base also has a locked chest in the final room which always contains Abnormal Bloomers. |
 |
Angel Mirror (天使の鏡) |
- | Civilian | Grants the item skill Angel Mirror. Heals either 20% HP or 300 HP for entire party, whichever is higher. Grants 5 uses per Quest. Cannot be removed. |
Merim starts with it. |
 |
Marble (ビー玉) |
- | Brawler Civilian |
Treasure from Rance. Cannot be removed. |
Athena starts with it. Does nothing. |
 |
Super Resistance Ring | - | All classes | Resistance [+200] Speed [+5] |
Can get it once if you win the timed sub boss fight in Quest #168. |
 |
Kalar Crystal (クリスタル) |
- | Sorcerer Healer |
Magic [+100] Resistance [+100] |
Can get it a single time if you choose to take the crystal in Quest #33. |
 |
Pocket Hammer (ポケットハンマー) |
800 | all | Stun [+15] | You can also buy a +30 Stun version once for 2000 gold. Versions randomly obtained from Quests are able to reach way higher stats and can drop with additional bonuses. |
 |
Pocket Knife (ポケットナイフ) |
- | All classes | Attack [+55] | Versions randomly obtained from Quests are able to reach way higher stats and can drop with additional bonuses. |
 |
Hanny Zippo (ハニージッポ) |
9999 | All classes | Grants the item skill Hanny Zippo. Revives character to full HP with that skill automatically after death. Works once per Quest. |
Obtained from seeing Nozomi's A Day in Cidade event. One can eventually be bought at Frostbuy. One is also available as a random donation reward. |
 |
Jewel (宝石) |
50000 | - | Can't be equipped, used in Quest #80 to exchange it for a Forbidden Talent. | Can drop from chests afer seeing event with Crane and Rance about an illegally working Level God. Can hold at most one at a time. |
 |
Learning Device (学習装置) |
- | All classes | Character with this item gains 110% experience. | Found at random in red chests. |
|
Modified Learning Device | - | All classes | Character with this item gains 120% experience. | Found at random in red chests in world 3. |
Unique equipment[]
There can be only one of each piece of unique equipment in the inventory. It is possible to upgrade all items by selling or donating them. After that they can be found at random treasure chests or gained from magnum bar reward with a random bonus and +1 for every time you have donated it.
Very important to note, that you can only find the donated/sold character unique items in the order they appear, so only donate/sell them 1 by 1 starting with items you want to upgrade first, because if you have donated/sold unique items above ones you want to find, for example Lia's clothes, you will always find Lia's clothes before you find any other character unique items, so don't donate them all at once, hoping to quickly find multiple replacements.
Tip: Not sure it's the best way and if it's worth doing, but if you really want to replace a specific unique, but having trouble to for a long time - only get rid of the one you want to replace, grab Tomato(with Liked by Treasure Chests) and Merim (with Improve Fortune and Treasure Appraisal+) and run to Quest #126: Malgreed 6th Stratum B2 and grab the chests there and restart if you don't find anything good, that way I've found 3 versions of Lia's whip within a few minutes, but the bonuses depend on completing high level quests, so ideally rush through F7-10 first, that way you should be able to find 10% stat boost and Talent R bonuses on uniques.
Leave out Merim once you find a good spot(I had a chest generated by Tomato that had a unique appear in the exactly same spot many times, for example) if you want to try for the +3 bonus or just remove characters with Treasure Appraisal before opening a chest. Take Kibako or Kenshin if you want to avoid encounters to save time.
List A[]
| Item | Name | Type | Useable by | Rank | Effects | Comment |
|---|---|---|---|---|---|---|
|
Lia's clothes (リアの服) |
Cloth armor | Lia only | AA | Defense [+100] Resistance [+100] Full Recovery After Battle Sexiness [+1] |
Lia starts with it. |
|
Oda Armor (織田鎧) |
Steel armor | Kou only | AA | Defense [+160] Resistance [+160] Speed [-15] |
Kou starts with it. |
|
Omikuji Box (お神籤箱) |
Blunt weapon | Copandon only | CC | Attack [+100] Accuracy [-100] |
Copandon starts with it. |
 |
Chaos The Darksword (魔剣カオス) |
Sword | Rance only | SS | Shatters Invincibility Fields Attack [+2000] Critical [+30] Talent R Experience Gain [-60%] |
Obtained after completing Quest #190. Cannot be sold or donated. |
|
Tulip 1 (チューリップ1号) |
Bazooka | Maria only | - | Attack [+500] Accuracy [+20] Stun [+20] |
Maria starts with it. |
 |
Naginata (薙刀) |
Spear | Fighter Level 30 |
BB | Attack [+380] Magic [+190] Accuracy [+10] Defense [+45] |
Rizna starts with it. Is also required to perform Wild Dance. |
|
|
Sailor Uniform (セーラ服) |
Armor | Sachiko only | CC | Defense [+35] Resistance [+40] Resilience [+10] Sexiness [+1] |
Sachiko starts with it. |
|
Lia's whip (リアの鞭) |
Short sword | Lia only | BB | Attack [+50] Accuracy [+50] |
Lia starts with it. |
 |
Decapitation Blade (首切り刀) |
Short sword | Kanami only | SS | Makes assassination easier [+20%] Attack [+333] |
Obtained after completing Quest #180. |
 |
Crystal Rod (クリスタルロッド) |
Staff | Shizuka only | SS | Magic [+333] Talent (+533 on 1000%) Efficient Action |
Obtained after completing Quest #179. |
|
Puncher (パンチャー) |
Glove | Crane only | S | Attack [+1] Stun [+80] Accuracy [+50] |
Crane starts with it. |
 |
Queen's Staff (女王の杖) |
Staff | Pastel only | AA | Magic [+350] Resistance [+100] HP [+500] Efficient Action |
Pastel starts with it. |
List B[]
- The Orgarhythm and Dragon Gloves can gain new effects beyond the ones listed.
- It's possible to get the "Talent Rare" effect, but it's very difficult to obtain. The easiest way is to use the "quick save" trick right before clearing quest #199, which grants an equipment from List B when cleared for the first time. See the "Hints and Tips" section for an explanation on the "quick save" trick.
- None of the other equipment can gain additional effects.
| Item | Name | Type | Useable by | Rank | Effects | Comment |
|---|---|---|---|---|---|---|
 |
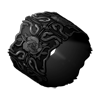
Orgarhythm (オルガリズム) |
Armor | Sorcerer Level 45 |
S | Saps 20% HP After Battle Defense [+100] Resistance [+100] Magic [+200] Body Boost [10%] |
Finding this armor unlocks Quest #152.
Obtained from filling the Magnum Gauge in Quest #145: Malgreed Dungeon 9th Stratum. |
 |
Sacred Tree Armor (神木の鎧) |
Armor | Fighter Gunner Healer Ranger Civilian Level 45 |
S | Defense [+280] Resistance [+280] Speed [+10] All damage [-20%] Body Boost 10% |
|
 |
Champion (チャンピオン) |
Armor | Fighter Level 45 |
S | Defense [+350] Resistance [+300] All damage [-20%] Attack [+200] Body Boost [10%] |
|
 |
Uruncel Blade (ウルンセルの刃) |
Dagger | Fighter Guard Ranger Civilian Level 45 |
S | Basic skills hit twice Attack [+400] Magic [+300] Critical [+50] Body Boost [10%] Talent R |
|
 |
Comet コメットさん |
Hammer | Healer Level 45 |
S | Attack [+800] Stun [+50] Accuracy [+25] Body Boost [10%] Effective against Constructs |
|
 |
Stronger (ストロンガー) |
Bow | Gunner Level 50 |
S | Attack [+999] Accuracy [+20] Resilience [+50] Body Boost [10%] Talent R |
|
 |
Dragon Gloves (ドラゴン手袋) |
Glove | Brawler Level 46 |
S | Attack [+400] Critical [+50] Body Boost [10%] |
Can get up to 2 more random effects when re-obtained. |
 |
Emperor's Armor (ラソウコウ) |
Armor | Ranger Level 45 |
SS | Defense [+400] Resistance [+200] Light element damage [-30%] Dark element damage [-30%] Body Boost [10%] |
Finding this armor unlocks Quest #151.
Obtained from filling the Magnum Gauge in Quest #127: Malgreed Dungeon 7th Stratum. |
 |
Ulaanbaatar (ウランバートル) |
Armor | Brawler Civilian Level 50 |
S | Defense [+300] Resistance [+300] Resilience [+100] All damage [-20%] Body Boost [10%] |
Obtained from filling the Magnum Gauge in Quest #171: The Bishop's Trap. |
 |
Magic Minister (魔法大臣) |
Armor | Sorcerer Healer Civilian Level 45 |
S | Defense [+200] Resistance [+200] Magic [+100] All damage [-20%] Body Boost [10%] |
|
 |
Persiom (ペルシオン) |
Sword | Fighter Guard |
S | Attack [+1000] Accuracy [+20] HP [+500] Body Boost [10%] Talent R |
|
 |
Terror Spear (恐怖の槍) |
Spear | Fighter Guard Level 44 |
S | Attack [+950] Accuracy [+10] Speed [+5] Critical [+50] Body Boost [10%] |
|
 |
Buddha (仏陀) |
Staff | Sorcerer Healer Level 50 |
S | Magic [+524] Attack [+330] Speed [+10] Body boost [10%] Talent R |