[] |
(c)アリスソフト |
[edit] Navigation:
|
| General info |
| Game mechanics |
| Playable Characters |
| Events |
| Items |
| Enemies |
| Dungeons |
| Walkthrough |
| CG Guide & Credits |
| Popularity Poll |
| FAQ |
| Cheat Engine |
| Cut Content |
This page details content cut from Rance VI.
Patch[]
Due to issues involved in decompiling Rance VI, the Rance VI fan-patch can be used to get easier access to the game's cut content, while also fixing some of the game's minor errors.
Icon[]

The original JP release of Rance 6 included a Windows .ico file that was not included in the English MangaGamer release.
Alice's Mansion[]
Untranslated Entry[]
The 1.0 MangaGamer translation included a brief, untranslated section in Alice's Mansion unlocked late in the game, after you get the standard ending. The menu item read "アンケート" (Questionnaire), and leads to Alice and Dark Alice discussing the original Rance 6 questionnaire, which was available at the game's original launch. At this point, they give the user a Yes/No prompt. If the user selects "Yes," the game will open the user's browser and would have directed them to the questionnaire, at least during the game's launch window. In the MG version, the link in question has been replaced with a link to the MangaGamer Rance hub instead. The entire, untranslated section was removed in a later patch.
Portraits[]
The easily-overlooked Portraits menu (unlocked after getting the "Happy End") contains several portraits not otherwise seen in the game. It is likely these portraits were created for the game's manual, and were included in the game as a bonus. These include: a Monster Soldier; Athena 2.0; Kentarou and Miki; and Feliss, who has both a standard sprite and a travelling cloak as per her chibi art in the ending. Feliss' sprite would later appear in Rance VI After.
Render Settings Message[]
The Render Settings mode has a message pre-programmed for use when you are visiting from Alice's Mansion, but it is never used even in Alice's Mansion. The message informs the player of other places where the mode can be found in-game.
Removed Staff Corner Entries[]
In the MangaGamer version of Alice's Mansion's Staff Corner, there are only four commentaries, all concerning the localized release and essentially exclusive to this version. However, the game originally shipped with fourteen commentaries, all distinct from the ones in the English version, as well as a "Changes" section and a "Supplementary Explanations" section meant to be read before playing (as per past Alice's Mansions). Some of these entries were quite extensive and even contained sub-menus. These commentaries can still be found, largely untranslated, in the game's data (although for technical reasons, if a developer uses a portrait, the attached name will be translated), along with numerous CGs used during the commentaries. The CGs are included below
Most of the cut content is typical development commentary, but some irregular entries also exist.
- Changes: Changes made to the game not mentioned in the manual.
- Supplementary Explanations: Curiously, the menus leading here are Japanese, but the commentary underneath has been fully translated.
- ランスシリーズについて: TADA attempts to summarize the Rance series to date. After he mentions a manual, there is an unedited translator's note from Aru Naru, which questions whether or not the MG release will even have a manual, which it did not. The existence of this translator's note suggests the section was cut early enough that it was never revised, and so the note never removed.
- このゲームの楽しい進め方: TADA provides general gameplay advice.
- TADA:
- "Future of Rance Series": TADA predicts the series will end after the tenth game (although he does not seem confident about making it that far), and he supplies five possible drafts for future games, one of which eventually became Sengoku Rance.
- "Favourite": Only available after clearing the main game. TADA talks about Copandan Dott, her brief role in the game, and plans for her future (many of which resemble what ended up happening in Rance Quest).
- "About 3D Dungeon": Commentary about 3D dungeon crawlers in general, resembling the commentary he would later make in the English version.
- とり (Tori):
- "Rance 6 Stuff": A brief development journal regarding her time on Rance VI.
- "It May be a Development Diary": A comedic depiction of Tori and TADA's working relationship, namely Tori (an Asshole) punching TADA (a Hanny) in the gut when he forgets how to do his own job.
- "Song of the Men": Only unlocked after completing the game. An in-universe scenario: the men of Ice Flame have discovered they are all at their Talent Caps. They decide to assault Rance in hopes of raising them, but are overwhelmed by the sight of his Hyper Weapon. Reincock, Shichisei and Starlevel the Great also make appearances.
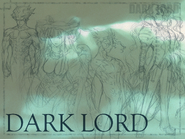
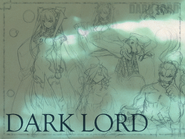
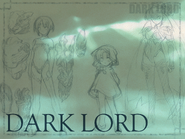
- 織音 (Orion): Two developer diaries (one discussing his love of Pokemon), as well as a selection of sketches of the Dark Lords from previous games (primarily Kichikuou Rance) drawn in an updated style.
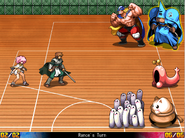
- しげ (Shige): Claiming to be suffering from stress prior to a convention, Shige falls asleep and dreams of Rance battling strange enemies. The player is sent to a battle using the National Gym battle background, controlling a powerful Rance and Sill versus modified enemies: a Wrestleman (now named "8月はこ"), a Nyo~ ("SkySong"), an Uppii ("真珠はうす"), a Catpot ("夏期休暇"), a Rommel ("Low救世2"), and an Okayu Fever ("その他大勢") in reserve. The game returns to the title screen after the battle is won or lost.
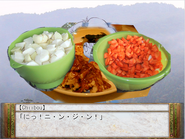
- ちーぼう (Chiibou): Chiibou (who continually changes colors) speaks briefly on development matters, and then attempts to describe the CG colouring process while being gradually overtaken by thoughts of food.
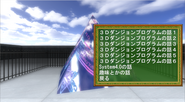
- 妹尾雄大 (Yudai Senoo): The player is placed inside a 3D dungeon environment with a rotating pyramid shape floating in front of them. This visual remains during the following commentaries. The player is able to select from 8 commentaries, six on the development of the game's 3D technology, one on the development of System 4 (which was still relatively new at the time), and one detailing Seno's favourite video games.
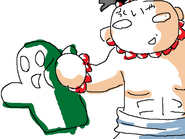
- えびちり (Ebichiri): Only available after clearing the game. With no pretense of developer commentary until the final lines, this entry presents a bizarre in-universe story where Karma Atranger becomes a magical girl thanks to the "Fried Food Fairy" (King Gandhi's disembodied head with Chizuko's headpiece as fairy wings), and goes on a rampage by giving other characters Sill's hair and haircut with the help of her magical girl rod, a frying pan. Karma eventually trips and strikes herself with the pan, causing the hair to consume her, at which point she wakes up as if from a dream. At this point, her frying pan finds its way into Alfra's hands as the Fried Food Fairy looks on from the shadows. This sequence's CGs are displayed in their own special gallery below, marked "Ebichiri's Scenario."
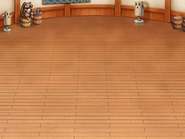
- 好緒 (Kōcho): Developer commentary, backed by a slightly modified background (the Ice Flame training room with a few doodled figures in the corner).
- ひさと (Hisato): Developer commentary, featuring a unique drawing of Papaya Server and Nomicon.
- 桜秀蘭 (Ou Shūran): Developer commentary, also featuring a chibi drawing of Shariela Aries, lamenting her absence from the game despite Shangri-La's proximity to Zeth.
- よーいちろー (Yoichiro): After a joke about scamming the reader for money, Yoichirio (represented by a generic resistance member) provides developer commentary.
- ふくぽん (Fukupon): Fukupon (represented by Karma Atranger) provides developer commentary.
- 桐島千夜 (Kirishima): Kirishima (represented by a young boy's sprite), lists a few of the characters he finds attractive. This happens to include one of the generic, faceless, "ugly" NPCs, leading to a confrontation with Rance.
- YOK: After a spoiler-related yes/no prompt, YOK provides brief commentary about certain character designs.
Alice's Mansion Gallery[]
Ebichiri's Scenario[]
Beta Menu[]
The retail version of Rance VI retains a menu left over from beta testing. The fan-patch provides its own method for accessing the beta menu. If hacking: the function T::章始め() must be called with an invalid chapter number (the variable in question is T::◆章, valid chapter numbers are 1-7). T::章始め() line 162 must be circumvented in some manner: this is used to direct new games to chapter 1, and prevents access to the debug menu in the retail release.
The game will present you with text informing you that this menu dates to the game's beta (Beta 2.5, July 16, "Save File Share Version"), and will then ask if you want to use "3D Mode" or "Selection Mode." In 3D mode, the game plays as normal, while in Selection Mode (elsewhere called "Simple Mode"), you do not interact with the map in the traditional fashion, even though the map is loaded and displayed. Instead, any time you enter a dungeon, you will be able to select its story and FR events from a menu, with no walking or random encounters in between. The game tries to offer its events only in the intended order, but this doesn't always happen. There are times where the order is screwed up deliberately (for example, the V2 Vevetar fight in the Nearby Forest is available from the beginning), while other times may have been an by accident. Some Selection Mode decisions may allude to older map layouts: for example, Insect User's Ruins mission 1 suggests that Dark Rance blocked the way to the antidote search, but not the fight with Dolhan, while in the finished version he essentially blocks both. This is an interesting way to play the game, but can be difficult, as there are no rests in-between battles (which tend to be dangerous setpiece battles), no way to collect minor prizes, and so on.
Be aware that many of the menus below do not have "Back" buttons unless noted.
- 第1章(経験ノーマル): Start Chapter 1.
- 第1章(経験1.5倍): Start Chapter 1 with 1.5x EXP gain.
- 第1章(経験2.0倍): Start Chapter 1 with 2.0x EXP gain.
- 第2章: Start Chapter 2. In this option and the other chapter options below, characters will be levelled up to (at least nominally) appropriate levels, and the party will be given a selection of items and Orbs for use on the base menu.
- 第3章: Start Chapter 3.
- 第4章: Start Chapter 4.
- 第5章: Start Chapter 5.
- 第6章: Start Chapter 6.
- 第7章: Start Chapter 7.
- ロード: The standard Load menu.
- 描画設定: The standard Render Setting Mode sequence.
- パッド環境設定: The standard joypad settings menu.
- マップテスト1: Go directly to a dungeon of your choice, in the variant of your choice. Maps use internal variants, identified by number, to distinguish missions and other circumstances. It is unclear if "missing" variants in the list below are the result of the variants not existing during the beta, or if they are not true internal variants. Your party will consist of all mandatory Chapter 7 characters (the ones that can't be removed from the party), plus Kaoru, Tamanegi, and L'il Avenger. They will all be at their respective starting levels, meaning some are much more powerful than others. Escape from the dungeon to return to the debug menu.
- 戦闘無しにする (No Battle): Kicks you back to the demo menu, but you have now disabled random encounters. This can then be used to pick a debug scenario or to join the main campaign with encounters permanently off. Note that there is no option to turn them back on short of restarting the game (the fan-patch can toggle encounters back at camp, it is not useful in this debug menu). Internally, this is a "DB" cheat, despite not being present on the DB cheat menu in camp, described down the page.
- 【01廃坑洞窟F】: Abandoned Mine F.
- 1:最初の迷宮: Opening sequence.
- 2:超弩級ボス: "Dreadnought Class Monster" mission.
- 0:通常もぐり: Standard dungeon delve. The door to the Dreadnought Class Monster will be locked.
- 【02奴隷観察場】: Slave Pits.
- 1:観察場に閉じこめられて: First visit, part 1. There is no way to access part 2 (after the Gate is opened) via the debug menu.
- 2:ヘルマンの王子: Searching for Patton.
- 【03森】: Nearby Forest. No variants or variant submenu, meaning the dungeon is only available in its pre-Chapter 7 state in terms of encounters and the inability to unlock the V2 Vevetar. As described above, Selection Mode can be used to fight the Vevetar.
- 【04イタリア】: Italia.
- 1:サーベルナイト: Saberknight mission.
- 2:サラキン: ATM mission.
- 3:血まみれ天使: Bloody Angel mission.
- 9:ノーマル: Standard dungeon delve.
- 【05ハニワ平原】: Haniwa Plain.
- 1:景勝の招待: Hot springs mission.
- 2:ロゼ: "Horny Nun" mission.
- 9:ノーマル: Standard dungeon delve.
- 【06共同銀行】: Cooperative Bank. Note the identical variant numbers. In reality, the variants are 1, 1 with modifications, and 2, respectively.
- 1:銀行侵入: Bank robbery mission, part 1.
- 1:銀行侵入+: Bank robbery mission, part 2.
- 1:頭取コルミック: Target: Colmic mission.
- 【07女の子刑務所】: Girl's Prison. No variants (although there is a submenu with only one option), meaning there is no way to access the Gal Monster prison variant from Chapter 7.
- 【08料亭】: Sakura & Pasta. No variants.
- 【09地下牢】: Eternal Dungeon. No variants.
- 【10写真館】: Zeth MV. No variants.
- 【11体育館】: National Gymnasium. No variants.
- 【12秋の森】: Autumn Forest. Note the lack of a standard dungeon delve variant.
- 1:サーナキア任務横取り: Ex-Resistance Members mission.
- 2:女の子山賊隊: Girl Bandits mission.
- 3:桜の通り抜け: Cherry Blossom-viewing / Mint robbery mission.
- 【13廃村】: Insect User Ruins.
- 1:解毒剤を探せ: Find the Antidote mission.
- 2:エミの挑戦: Emi's Challenge solo mission for Rance. Because it is impossible to come to the map solo via the beta menu, this mission cannot be completed in 3D mode, but it is possible to explore in Selection Mode.
- 3:エミをお仕置き: Punish Emi mission.
- 4:カロリアの儀式: Insect-Adding Ritual mission.
- 0:ノーマル: Standard dungeon delve.
- 【14治安本部】: Public Safety HQ. No variants, so the player must complete both halves of the mission in one go.
- 【15試験会場】: 3rd Test Site.
- 1:マジックを襲え: Kidnapping Magic, part 1.
- 1B:マジックを襲え: Kidnapping Magic, part 2.
- 0:フリー挑戦: Standard dungeon delve.
- 【35:パパイアの塔上】: Jump Tower Upper Levels mission. No variants (not even a submenu). Oddly, the game calls variant 2 instead of a 0 or a 1 like other maps with no variants, presumably a remnant of Dungeon 21, below.
- 終了: Return to the demo menu.
- マップテスト2: A second set of maps like above.
- 【16ペンタゴン】: Pentagon HQ.
- 1:ペンタゴン基地侵入: Negotiate with Pentagon mission.
- 2:ネオペンタゴン: Stop Neo-Pentagon.
- 0:無し: Unused standard dungeon delve.
- 【17 首都】: Zethan Capital.
- 1:偵察: Investigate the Capital mission.
- 2:救出: Rescue the Defenders mission.
- 3:7章にて: Annihilate the Remaining Squad mission.
- 【18琥珀の城】: Amber Castle. Note that there is no way to play the dungeon with the rafts automatically raised, as seen during the story.
- 1:ラドン誘拐: Abduct Radon mission.
- 0:無し: Unused standard dungeon delve. The thunder tower does not impede movement. The star that should trigger reinforcements exists, but does not activate, allowing the player to move through without any trouble. There is no way to move from the "Unnaturally Small Room" into Emi's secret room.
- 【19赤川】: Anise's Mystery Dungeon. The dungeon will remove all standard party members as intended, but because you have party members from later in the game (Kaoru, Sanakia, Sel, Magic, L'il Avenger), they will remain in the party.
- 1:ラドンと取引: Initial trip.
- 9:二度目以降: Variant used on revisits, i.e. Sill's event star is near the starting point instead of deeper in the dungeon.
- 【20マジックの塔】: Magazine Tower.
- 1:最初の侵入: Destroy the Mana Battery mission, part 1.
- 10:パパイアの後: Destroy the Mana Battery mission, part 2.
- 【21パパイアの塔】: Jump Tower Lower Levels.
- 1:パパイア: Destroy the Mana Battery mission.
- 2:パパイア征伐/後編: Defeat Papaya mission, part 2.
- In the fan-patch, an additional item appears in this menu to turn on the JP 1.0 monster gauntlet against Papaya's "Danger Course" here in beta mode. After pressing the item, the player must return to this section and select a map variant. The JP 1.0 gauntlet is described in another section of this page.
- 【22パリス学園】: Paris Academy. No variants (or variant submenu).
- 【23:ロリータハウス】: Lolita House.
- 1:ロリータハウス: Take Down the Cause of Alfra's Fear mission.
- 2:眼鏡っ娘ハウス: "House with Glasses." Apparently a cut variant of Lolita House. The game will attempt to load the map's variant #2 and will fail, causing the game to revert back to the debug menu. Examining the dungeon's code reveals no remaining signs of other variants, though the game does test to see if you are in variant 1 before delivering much of the level's content.
- 【24:博物館】: Royal Museum.
- 1:博物館1回目: Scout for Magic Tools mission.
- 9:汎用: Standard dungeon delve. You are able to access any of the four thefts by visiting the exhibits twice. Because each theft is considered the "first" overall, the monsters will be scaled to match and there is no way to access the other monster gauntlets.
- 【25:モヘカの館】: Moheca's Mansion.
- 1:モヘカの館偵察: Investigate the Missing Boys mission.
- 2:モヘカの館再び: Investigate the Suspicious Laughter mission.
- 3:アベルトの館: Final battle against Abert.
- 26:日曜の塔(ナギ): Sunday Tower. Note that the usual brackets are missing from this menu entry to help it fit inside the menu.
- 1:ナギの塔: Shizuka's Revenge mission.
- 2:パパイア征伐/前編: Unused variant. Functionally empty like a standard dungeon delve. Judging from the name of the menu item ("Papaya Conquest / Part 1"), it seems they considered using a variant of Sunday Tower for the post-game Jump Tower at some stage, since the two dungeons are identical. In the end, they copy and pasted the dungeon instead, creating Dungeon 35 from the first dungeon list.
- 【27:地下墓地】: Sleepy Village Cemetery.
- 1:魔物退治: Destroy the Undead mission.
- 2:アノキア退治: Queen Anokia mission.
- 3:ネクロマンサー退治: Defeat the Necromancer mission.
- 【28:要塞】: Alpha Fortress. No variants or variant submenu.
- 【29:廃棄迷宮】: Disposal Dungeon.
- 1:カオス取り: Retrieve Chaos mission.
- 9:汎用: Standard dungeon delve.
- 【30:電卓迷宮】: Calculator Cube. The player will be properly restricted to Rance and his one teammate based on the variant. Note that in the main storyline, Kanami's dungeon is unlocked last rather than first.
- 1:かなみモード: Kanami's dungeon.
- 2:シィルモード: Sill's dungeon.
- 3:志津香モード: Shizuka's dungeon.
- 【31:ノクタン鉱山】: Noctun Mine. Note the lack of a standard dungeon delve variant (which is variant 0 if hacked into the list).
- 1:チューリップ1: Maria's first request.
- 2:チューリップ2: Maria's second request.
- 【32:地下水路】: Smoky Sewer. No variants or variant menu. Despite the introduction text implying this is your first visit, the event star that would normally force you to leave mid-way through the dungeon has been removed, allowing the dungeon to be completed in one trip.
- 【33:フルーツ遺跡】: Fruit Ruins. No variants or variant menu.
- 【34:マジノライン】: Maginot Line.
- 1:マジノ攻略1: Final mission, part 1.
- 1:マジノ攻略2: Final mission, part 2.
- 2:アベルト救出: Rescue Blue Squad mission.
- 【16ペンタゴン】: Pentagon HQ.
- TADAテスト: TADA Test. This menu consists of seven items that produce a mix of scenes related to the Maginot Line collapse and world map. They are highly similar, most featuring troop movements on the Zeth map - perhaps TADA was testing those map CGs? The code used to call the scenes appears to be a copy-paste of one of the Debug scene test menus described below, possibly moved here for convenience (or vice versa). The images for these scenes are among the last added to the game, which may imply these scenes were still being tweaked close to release.
- アリスの館: The standard Alice's Mansion menu.
- デバッグメニュー: A Debug Menu. Called Shade's Debug menu internally.
- とり小屋: Test in-map scenes from across the game, including various sorting methods.
- しげ小屋: A cheat menu. This menu modifies the current game, which in this case means the beta test party. Some of these cheats might transfer to the campaign if you use the chapter cheats at the head of the menu.
- アイテムずるっこ (Item Shack): Gives 1 of every item.
- 武器Cずるっこ (Weapon C Crap): Sets all party member's weapons to Rank C.
- 防具Cずるっこ (Armor C Crap): Sets all party member's armour to Rank C.
- EXPずるっこ (EXP Crap): Sets everyone's EXP to 9999. Not very useful in beta mode, where you have no access to WIllis, which may imply that something was changed between versions.
- EVアイテムずるっこ (EV Item Swap): Gives all key items.
- CGモードずるっこ (CG Mode Chute): Unlocks all CGs. To save them, press this menu item, visit a chapter via the chapter select, and then save your game.
- 戦闘実験 (Combat Experiment): Rance, Sill and Kanami will battle three Can Cans. Visiting the party screen, you'll see that the game has unlocked Rance, Sill, Kanami, Maria, Shizuka, Rizna and Patton, all level 80. If the player has visited a test map before coming here, the rest of the beta test party will also be present, and vice versa. It can be helpful to come to this feature before visiting a test map, since the Level 80 characters are very helpful.
- シナリオチェック: Test scenes from across the game, without breaks in between scenes. Beware "全部チェックするなり" ("Check all") which could run for literally hours even on skip.
- 音楽チェック: An early sound test built using the in-game menus. There is no way to exit it once entered.
- 平野メニュー (Hirano Menu):
- 戦闘アニメエディタ: A powerful battle animation test tool, allowing you to test any combination of attacker, defender, attack and result. Begging to be translated, not just because it would be fun to mess with, but because I don't understand the half of it and couldn't begin to document its features. The tool's preferences are even saved (or at least they're supposed to be) to a new save file called "戦闘アニメエディタ用セーブデータ.asd" ("Save Data for Battle Animation Editor.asd").
- 落とし穴座標: Repeatedly loads maps while trying to output data about them to the Sys4 IDE (according to the name of the menu item, this data involves "pitfalls"). Unfortunately, IDE output only works when running the code in the System 4 IDE, and does nothing in the standalone game.
- ヘルツチェック (Hertz Check): Outputs music-related data to the IDE.
- 終了: Back.
- 妹尾メニュー (Seno Menu):
- OPデモ: Plays the opening movie.
- エンディングA: Plays the initial end credits.
- エンディングB: Plays the "Happy End" credits.
- 終了: Return to the beta menu.
Base Debug Menu and DB Mode[]
An additional debug menu can be unlocked on the base screen by modifying T:拠点制御/選択.jaf line 10 to "if(true)". This adds the debug menu to the top of the base's list of options, under the name "【いんちきー(-_-) いんちきー】" ("Inchiki (-_-) Inchiki").
The initial menu contains three entries, but by pressing "DBモードオン", you will activate "DB Mode" and additional options will appear the next time you visit this debug menu (below). While DB Mode is active, you also gain an additional benefit: if Tamanegi is in the party, a new option appears on the Base screen to automatically capture all remaining Gal Monsters.
Another bonus is available with additional hacking (this hacking is not necessary with the fan-patch): in remaining.jaf, BattleSettingsMenu(), line 887, replace "false" with "true." This will allow DB mode to activate an "Auto-WIn" option on the in-battle Settings menu. In the JP 1.0 version of the game, this feature was unrelated to DB Mode but still requires the hacking described above to be activated.
The complete menu (with DB Mode Active) is listed below.
- DB:戦闘経験値 1倍: Set EXP modifier to 1.0x (default).
- DB:戦闘経験値 1.5倍: Set EXP modifier to 1.5x.
- DB:戦闘経験値 2.0倍: Set EXP modifier to 2.0x.
- DB:敵モンスターデータ: This is supposed to output data to the IDE regarding how many monsters of each type the player has defeated (information not used anywhere else in the game), as well as something related to each story mission (Rance's level when the mission was started?). When playing outside of the IDE, it does nothing.
- DB:全員レベルアップ: Level up every playable character (even those not in the party) three times, but not beyond their current Talent Cap. Their HP is not refilled to match their new totals, so it pays to visit a dungeon and then leave to restore it.
- DB:スーパーレーダー装備: Sets the party's radar level to 2, even higher than the Swallowtail Radar upgrade (1). This marks most map collectibles, except for FR events, even if you have yet to see them. This includes stars using an otherwise unused icon, which are unseen in the main game due to Swallowtail only marking squares you have already visited, which guarantees they will be cleared of stars. The radar upgrade even shows some events that are otherwise invisible, while some event stars (seemingly those added dynamically, like Tamenegi's join event in the Nearby Forest) do not appear at all.
- DB:ランダムアイテム: Rewards one S Weapon Egg (M), one A Weapon Egg (M), one A Armor Bun (M), max (65535) GOLD, and four random items from the mapping rewards list, one from each percentage slot. This code doesn't call the actual mapping rewards function, but copy and pastes it, instead, modified to remove the checks that prevent earning multiple copies of certain items.
- DB:ランス:ノーマルソード: Sets Rance's sword to A-Rank, unegged.
- DB:ランス:カオス: Sets Rance's sword to Chaos.
- 迷宮処理:3Dに変更 or 迷宮処理:選択に変更: This is a DB Mode-only item, despite the lack of "DB" in the label. Toggles between 3D or Selection Mode (see the Beta Menu for more details), allowing them to be used during regular gameplay. Some Selection Mode features are only available during the main game (as opposed to the beta menu). The most valuable of these is found in Chapter 7 in Abandoned Mine F, where Selection Mode can automatically trigger a fight against the Archfriend.
- 持ち物追加 玉拾い: This item does not require DB Mode and is part of the default menu. Rewards 3 Crab, Monkey and Ram Orbs.
- イベント進行状況確認: This item does not require DB Mode and is part of the default menu. This entry outputs a great deal of event-related data to the IDE. When running the game outside of the IDE, it essentially does nothing.
In-Dungeon Debug Menu[]
Yet another debug menu can be found in dungeons via the function T::迷宮コマンド(). This menu contains a number of features (some removed) that suggest it was an early version of the four buttons that appear in the bottom-right corner of the screen in the final game. The fan-patch unlocks this with a cheat.
When activated, the menu will display a list of information about the dungeon, most of which is available through other means in the current game, though a few exceptions exist such as a step count and the number of monsters defeated.
- 壁破壊: This function is designed to destroy "EVWalls" in the environment, and only appears in the menu if you are directly facing one. EVWalls seem to be the kind that the player can already destroy by moving "into" them. Given the nature of this menu as an early substitute for the buttons in the bottom-right corner, this may suggest that these walls could originally only be destroyed via a dedicated "search for secret passages" button, like those found in early dungeon crawlers.
- 任務表: This "Check Mission" feature.
- 戦闘無くす: Cheat to disable random encounters. As per the beta menu, above, there is no option to restore wandering monsters, though the fan-patch adds this option to this menu.
In addition to the above, the menu contains some cut features. The first is an early version of the "Search for Monsters" button, and the second an early version of the "Camp" button.
Additional Logging[]
There are additional calls to log results to the IDE scattered throughout the program, using three different, destination logs. One is the primary log, the second (and most frequently used) is named after TADA, and the third was probably used by Shade as it is largely restricted to his debug menu. Some of the information they are designed to log is brief, while others are quite detailed, such as battle processing.
Unused Features[]
Pre-Set Mapping Rewards[]
In the finished game, mapping rewards are randomized off of four shortlists, with checks in place to prevent duplicates of certain items earned via this method. However, the code actually has provisions for pre-set mapping rewards that are never used.
Expanded In-Dungeon Settings Menu[]
The in-dungeon settings menu (available by hovering the mouse in the top-left of the screen) contains quite a bit of dummied code providing access to features that are otherwise inaccessible. Considering the settings menu already fills the screen, the original menu must have been quite cluttered!
Removed options include:
- Code to switch to a fourth control scheme, type 2 internally. This control scheme is identical to type 0, "Click areas on the screen to move" (either that, or the control scheme no longer exists and the game is defaulting to type 0. The process is handled by a DLL so the specifics are unknown).
- Toggle options to "Display all flags on map." These menu items have simply been dummied out with an if(false) check and can be easily restored by hacking or the fan-patch's built-in cheat code. Despite the name, activating this causes the entire map to be revealed, geography and flags alike. The flags are revealed similar to the Level 2 Radar DB Mode cheat discussed above. The player's current map progress remains stored behind the scenes, including percentage towards rewards, and the cheat can be turned back off from the menu.
- Two deprecated options designed to switch off Direct3D mode, one that checks if it is on first, and one that does not. These more than likely no longer work, given the far more complicated graphic mode options currently employed. There is no evidence of a corresponding, early system designed to turn Direct3D on.
- "No Wait Mode": If employed, this would have removed the animation of moving between squares on the map, giving the game the feel of extremely early dungeon crawlers. This also removes the delay between inputs, removing almost all control and creating an ugly effect. Ironically, a math error that can be created by AINDecompiler during hacking creates a much smoother effect by retaining the input delay.
- An option to access the message backlog, which is otherwise inaccessible during dungeon navigation in the finished game.
Map Auto-Complete[]
A function exists in the code to automatically map an entire dungeon. While it is likely this was only used as a testing function, the feature may have been used in a similar fashion to later Alicesoft games (e.g. Evenicle) to reveal the entire map after a certain percentage has been reached. This would have filled in mapping irregularities like those found in Pentagon HQ (which has a single inaccessible square) and Public Safety HQ (which outright has an error making it impossible to reach 100% without the fan-patch).
Unused Monster Sprites[]
The Can Can enemy has two unused attack sprites, even though none of her actions count as "attacks" in the final game. The second such sprite is drawn in a way that implies the game might have used a pink graphical effect when the attack played out. Some sources say that the first of the two sprites was used as an alternate image for the Lucky Can Can in the JP version, but this seems to be untrue, at least in the versions tested.
The game also includes two outright unused enemies. One exists in the game's data: the Super Prisoner. Her HP and attack are 99, while the rest of her stats are 0. These stats and her name suggest she might have appeared in Girl's Prison, where she would be comparable to the Low-Rank Mage. This seems likely considering the dungeon is already full of cut content (most of which can be seen during Chapter 7), but alternatively, she might have appeared as a strong, event enemy in the Slave Pits or Cooperative Bank (as a prisoner of Zulki Crown). For testing purposes, her internal ID number is 300.
There's another enemy that isn't used by the game, but it can still be identified: it is a Kreuz, an additional model of Holy Skeletal Fighting Marshal. The Kreuz previously appeared in Persiom as the ultimate monster of this type, and has not appeared in any other Alicesoft game. Notably, the Kreuz does not have second attack sprite like other Fighting Marshals of its power level, indicating that it either only had standard attacks, only had charged attacks like the High-Rank Mage, or that it was never developed beyond the point where other Marshals were given two attacks. The Kreuz's art suggests that it would appear at ID 166, but this number is held by the Doodle Dog in an unusual break with the established pattern.
A rough sprite of a man in loose chains also appears in the data. As it is the exact size as all other human-sized combat sprites (and was resized and repositioned in data appropriately by the MangaGamer team), this may have been a sketch of an additional monster. Unlike all other monsters in the game, including the cut ones, it has no attack sprite.
Papaya's Original Challenge[]
Papaya's challenge gauntlet in the basement of Jump Tower was originally much harder. The JP version of the game was eventually patched to reduce the challenge, a change that remains in the EN version. In a potential oversight, the EXP rewards for each fight were not modified. The fan-patch includes a method to experience these original fights.
Change are as follows, with the 1.0 version on the left and the patched-JP and EN version on the right.
- Round 1: 3 Samera~i in both versions. No change.
- Round 2: 3 Wall Guys and 3 Frozen - > 2 Wall Guys and 2 Frozen.
- Round 3: 2 Hugant -> 1 Hugant.
- Round 4: 2 Master Geckys, 1 Captain Vanilla, 1 Super Tactician, 2 Majician -> 2 Master Geckys, 1 Captain Vanilla, 1 Super Tactician.
- Round 5: 3 Wasp Girls and 2 Kamikaze -> 2 Wasp Girls and 1 Kamikaze.
- Round 6: 1 Warlord, 2 Samera~i -> 1 Himmler, 2 Samera~i.
The Warlord (who strongly resembles Borg) is essentially removed as a standard enemy by this change, restricted to the semifinal round of the "Fictional: vs Fiend Squad" Madness Mode battle. It is incredibly durable, with 99999 HP. As "vs Fiend Squad" is incredibly hard, the sprites of this exclusive enemy are provided below.
End Credits[]
The game's True ending contains code for several scenes that can be swapped out depending on the player's progress in certain side-quests. For example, if you have completed Nagi su Ragarl's quest, she will appear in the True ending, while if you haven't, Kimchi, Emi and Radon will repeat their scene from the standard ending. There are three variants in total (see Complete End Credits for more details). However, there was originally going to be four: the True ending scene where Saias proposes to Uspira (and is rejected) is also set up to be optional, but its flag is always set to true. If it were somehow set to false, the scene would have been replaced with the standard ending scene with Magic in her bedroom, complaining about Rance.
The Special Events Completed percentage in the end credits includes a few irregularities. The player receives 12% for free, but these additions are scattered throughout the code block, six in total (each worth 2%), suggesting that each was originally tied to distinct events that have since been removed. The code in this section is organized by theme, which may help identify the gaps. Two of the freebie points appear in the middle of the "in-dungeon optional tasks" block, which includes objectives like rescuing Feliss, while the other four sit on the border of in-dungeon tasks and the bonuses for completing sidequests, and could belong to either, both, or something else entirely. In one final peculiarity, even though the Doodle Dragon from Abandoned Mine F is a bonus boss and sidequest in the final game, the code for this section files it as an "in-dungeon task," rather than either a bonus boss or sidequest.
Deleted Scenes[]
Present Events[]
In the final game, the Present object is used from the Status screen, allowing them to be used mid-mission if necessary. The only exception is Kimchi via the event "Give her a present." This scene features a cryptic line from Rance suggesting that the contents of the Present are magical, transforming into something the recipient wants most. It turns out that this wasn't meant to be the only Present scene in the game, as others can be found in the code, tied to character event #60 for each applicable character (including Kimchi).
The scenes were clearly abandoned part-way through the development process. Most of the scenes include the "transforming present" idea:
- Rocky: Receives an issue of Busty Blondes Magazine (Rance already opened the present before giving it to him).
- Abert: He refuses to show his Present's contents to Rance.
- Tamenegi: An incomplete scene where the Present contains a toy for his son.
- Copandon: Yakiyan-style takoyaki, a Portuguese specialty and apparently her favorite food.
- Li'l Avenger: A pincushion. Unlike the others, Li'l Avenger's scene was translated into English.
- Urza: Her Present is empty, since her heart only wants peace and equality, though she wonders if the box contains Rance's feelings. Notably, Urza is in her wheelchair in this scene, while in the final game she can only be given Presents after she begins to walk again.
Each of the above scenes is still accessible via the title screen debug menu, via the デバッグメニュー -> シナリオチェック submenu.
Other characters have incomplete scenes where they are either given bouquets or undefined presents. While most of these scenes are single-line filler (similar but not necessarily identical to one another), some elaborate on the bouquet concept somewhat, possibly suggesting that the Present item was at one point a Bouquet item. With one exception, the scenes below are not accessible from the debug menu.
- Sill: Short "Bouquet" scene talking about how much she enjoys the flowers.
- Kanami: "Present" filler. This scene is still accessible via the title screen debug menu.
- Rizna: "Bouquet" filler. Her message is located in MES_TADA.jaf instead of MES_リズナ.jaf as expected.
- Maria: "Bouquet" filler.
- Shizuka: "Bouquet" filler.
- Patton: "Present" filler.
- Caloria: "Bouquet" filler with a single additional line saying the flowers are her favorite.
- Kaoru: "Bouquet" filler with very different phrasing from the others.
Sanakia has an event #60, but the function consists of a single return statement and nothing else.
Magic, Bernard, Cessna, Prima, Megadeath, Seyadatara, Alex, King Gandhi, Rick, and Satsu have no event #60 (indeed, Alex and Rick have no message file whatsoever), nor any other sign of a missing Present scene.
Other Scenes[]
Other unused scenes appear in the file MES_TADA.jaf, as follows. Unless listed, these scenes are unused by the rest of the code.
- 体験版/エンド: Scene from the beta version of Rance VI, which tells the player the trial is over. A call to this function can still be found in the Pentagon's Base dungeon, but it has been commented out: obviously, this is where the beta (or at least one of several betas) ended.
- 体験版/スルー: Beta-only scene designed to mark incomplete features.
- ランス28: Debug scene where Rance lists the number of monsters he has killed plus one, having apparently just killed a dog off screen. This function may have been used to test Ippatsu's unlock conditions.
- ランス25: Debug scene that displays the number of times Rance has had an H-scene with each female character, including several (all?) NPCs. This data is still tracked in-game, but is never displayed.
- ランス26: Complete scene where Mikan comes to Rance when he is sick and gives him "secret information," revealing every playable character's Talent Cap and complimenting you if you've reached them. This is a very long list, and the game makes no effort to truncate it, not even removing party members that have yet to join.
- ランス27: Debug scene that displays various data about the player's progress in each dungeon.
- リズナ60: Rizna's filler Present scene, as detailed above. This function and the next both include IDE-exclusive debug info seemingly not found in the rest of the game.
- ランス39: Found in MES_CHR.jaf, the file's only contents. Rance and Chaos talk about the ongoing war and the inevitable collapse of Zeth. This scene is incomplete: besides not necessarily coming to an end, the function includes the debug information mentioned in Rizna's filler Present scene, and begins with the words "[ランス39]" (like several of the functions in MES_TADA.jaf). Finally, towards the end of the dialogue, the author writes "注意:ここは後で調整" ("Caution: I will adjust this later") and then indents the remaining lines to suggest that they're the lines meant for revision.
Etch Failure Flag[]
The event "Pissed off, use Sill as a distraction" has strange entry conditions. The player must sleep with Sill at least four times (this H-count variable is rarely used in its own right, making things even more unusual), and must have seen one of several scenes where Rance is rejected by certain major characters. These scenes set a flag called フラグエッチ失敗, "Etch Failure Flag." The scenes include:
- Rizna: I should enjoy that erotic body.
- Rizna: Press for sex.
- Maria: Push over a glasses girl.
- Shizuka: Invade her room.
- Caloria: Call her to my room for sex. (either variant)
To prevent the player from being locked out of "Pissed off, use Sill as a distraction," they can automatically fulfill this second condition by reaching Chapter 7.
After the scene "Pissed off, use Sill as a distraction" is complete, the Etch Failure Flag is set back to 0. But since "Pissed off, use Sill as a distraction" is a one-time event, there is no reason to reset the variable. This, combined with the fact that there are plenty of other rejection scenes that "don't count," suggests that the developers planned to implement multiple scenes where Rance works out his sexual frustrations after being rejected, but dropped the concept part-way through development, leaving only this one example and these five trigger events.
Notes[]
This game has a Notes page.

